

-
🎉 It’s time to party, paper crafters! 🎉 Stampin’ Up! is throwing a big celebration for National Scrapbooking Day—and you’re invited! For TWO DAYS ONLY (May 2–3), you’ll earn DOUBLE REWARDS on all your crafty purchases! 🛍️✨ Yep, that’s right—2x…
-

🎉 May Card-Making Classes Are Here — Featuring Brand New Goodies! 🎉
I’m excited to announce my May in-person Card-Making Classes — and this month is extra special! We’ll be creating four gorgeous multilayer cards featuring brand-new stamps, bundles, and designer paper from Stampin’ Up! 🥳 Your exclusive card-making kit will include everything you…
-
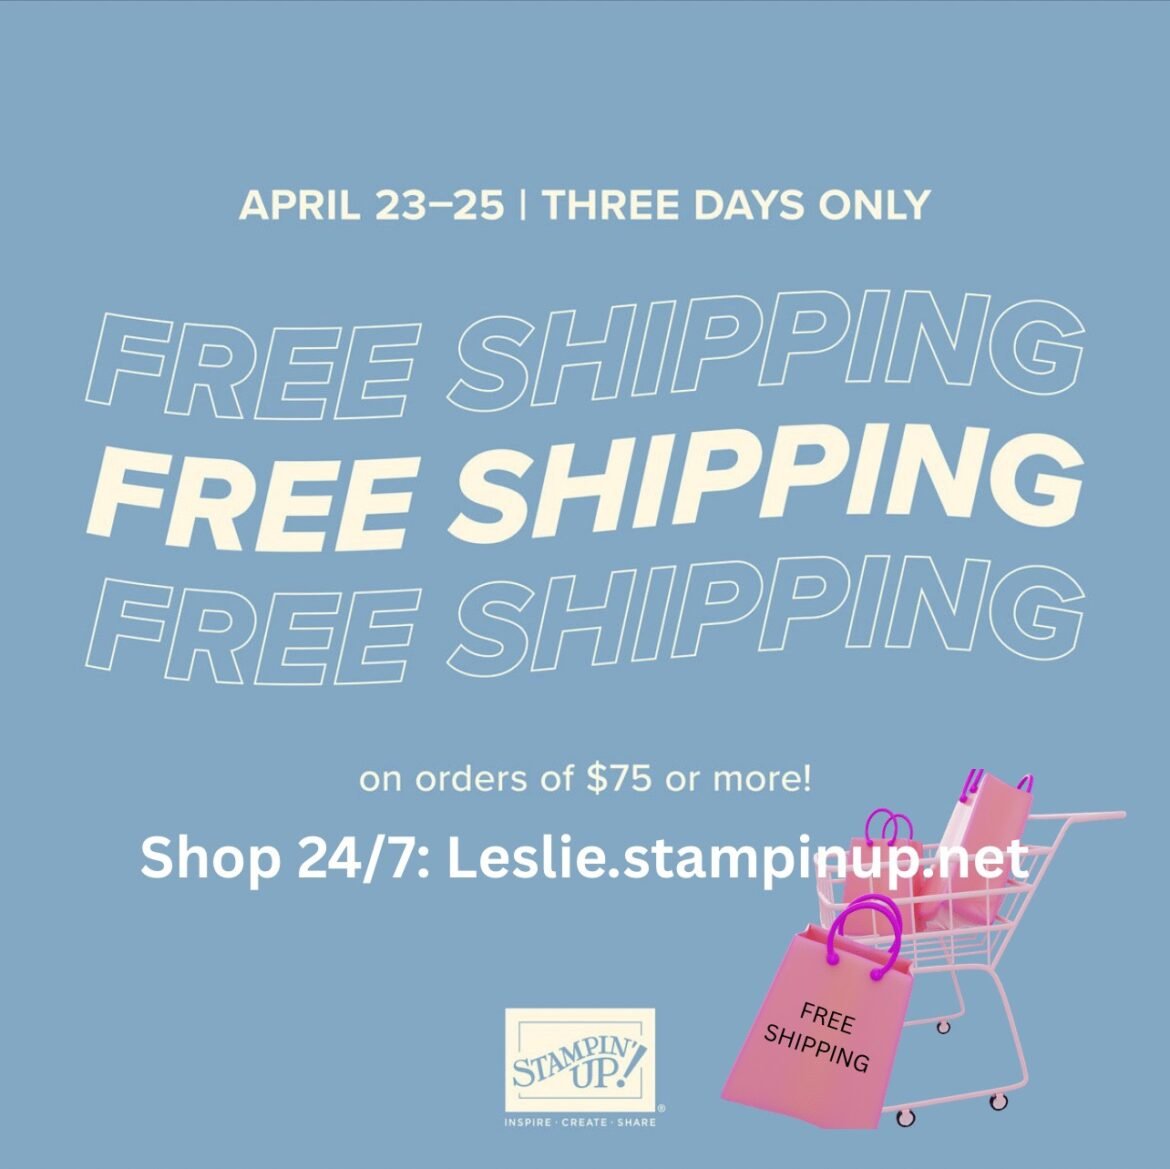
FREE Shipping + Up to 75% Off? Let’s Go, Crafty Friend!
Hey crafty friend — BIG news! 🎉 🚚 FREE SHIPPING on orders of $75 or more starts tomorrow, Wednesday, April 23rd! Snag your favorite paper crafting goodies — no shipping fees, just crafty fun. 🎉 Plus, don’t miss out on Stampin’ Rewards — earn free…
-
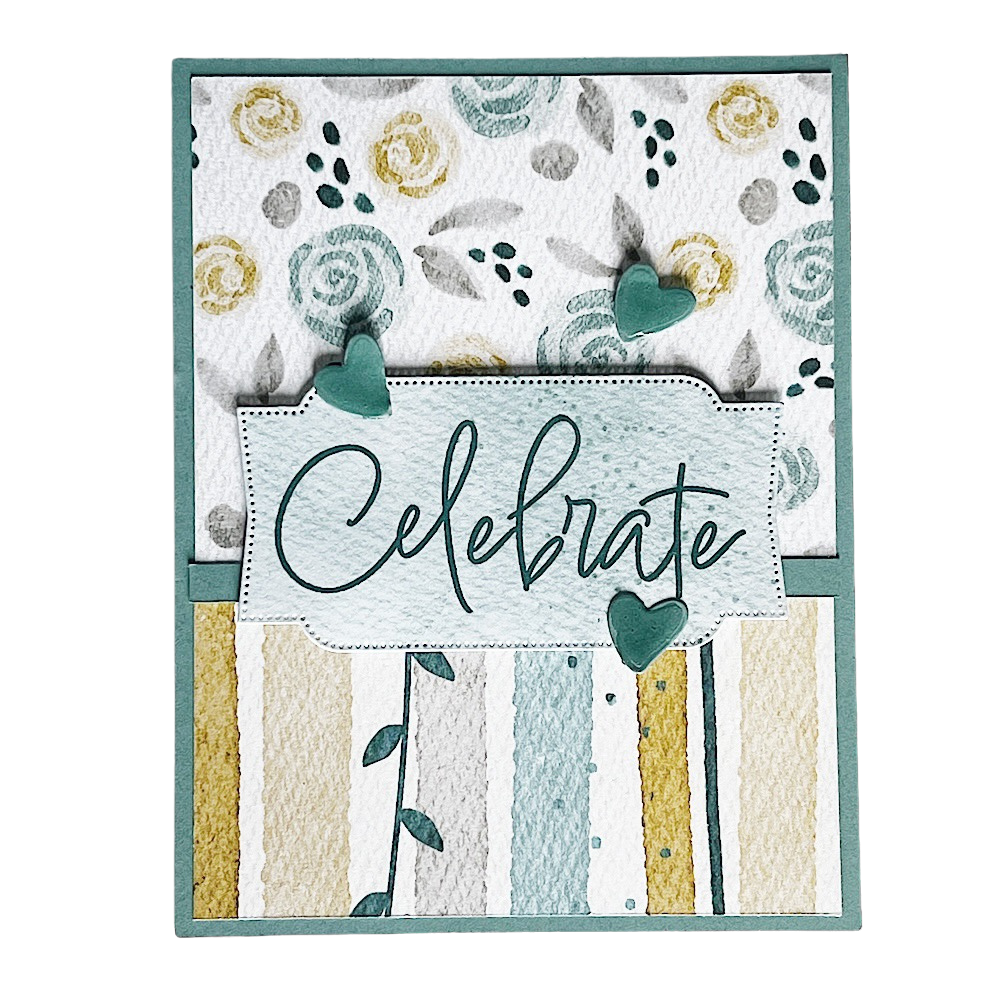
Faux Enamel Dots: Easy Card Embellishments You Can Make
Sometimes starting with a blank card can feel a bit overwhelming—but that’s where card sketches come in handy! The card I’m sharing today was inspired by a simple sketch featuring three small embellishments. Be sure to scroll to the bottom…
-
Ready to Save More on Crafting?
I’VE GOT SOME GOOD NEWS FOR TAX DAY!!! Starting April 15th, every order over $20 you place will earn you 10% in rewards! Here’s how it works: Get ready to save more on crafting by creating your account here today:…