
-
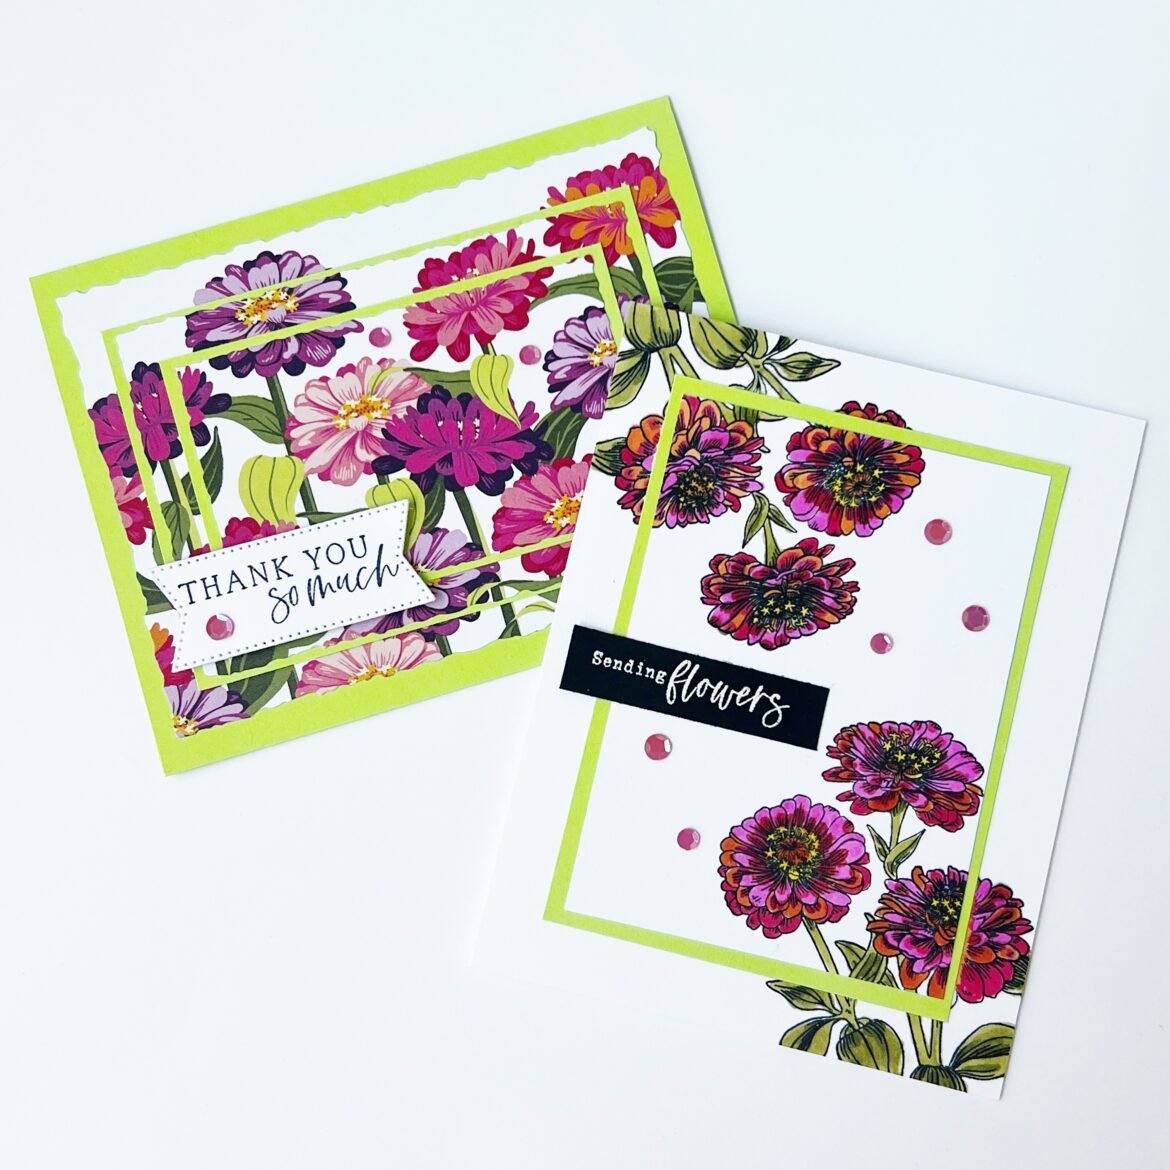
via GIPHY I guess you can teach an old dog new tricks! I’ve been paper-crafting for more years than I can count and, although the double and triple layer card-making technique has been around for awhile, today was the first…
-

Embracing Summer Adventures: A New Chapter for our Paper Crafting Classes
Hello, dear crafting friends! How’s your summer going? My summer is packed with travel plans and fun family activities. While I am thrilled about these adventures, they also mean I need to take a short break from holding my in-person…
-
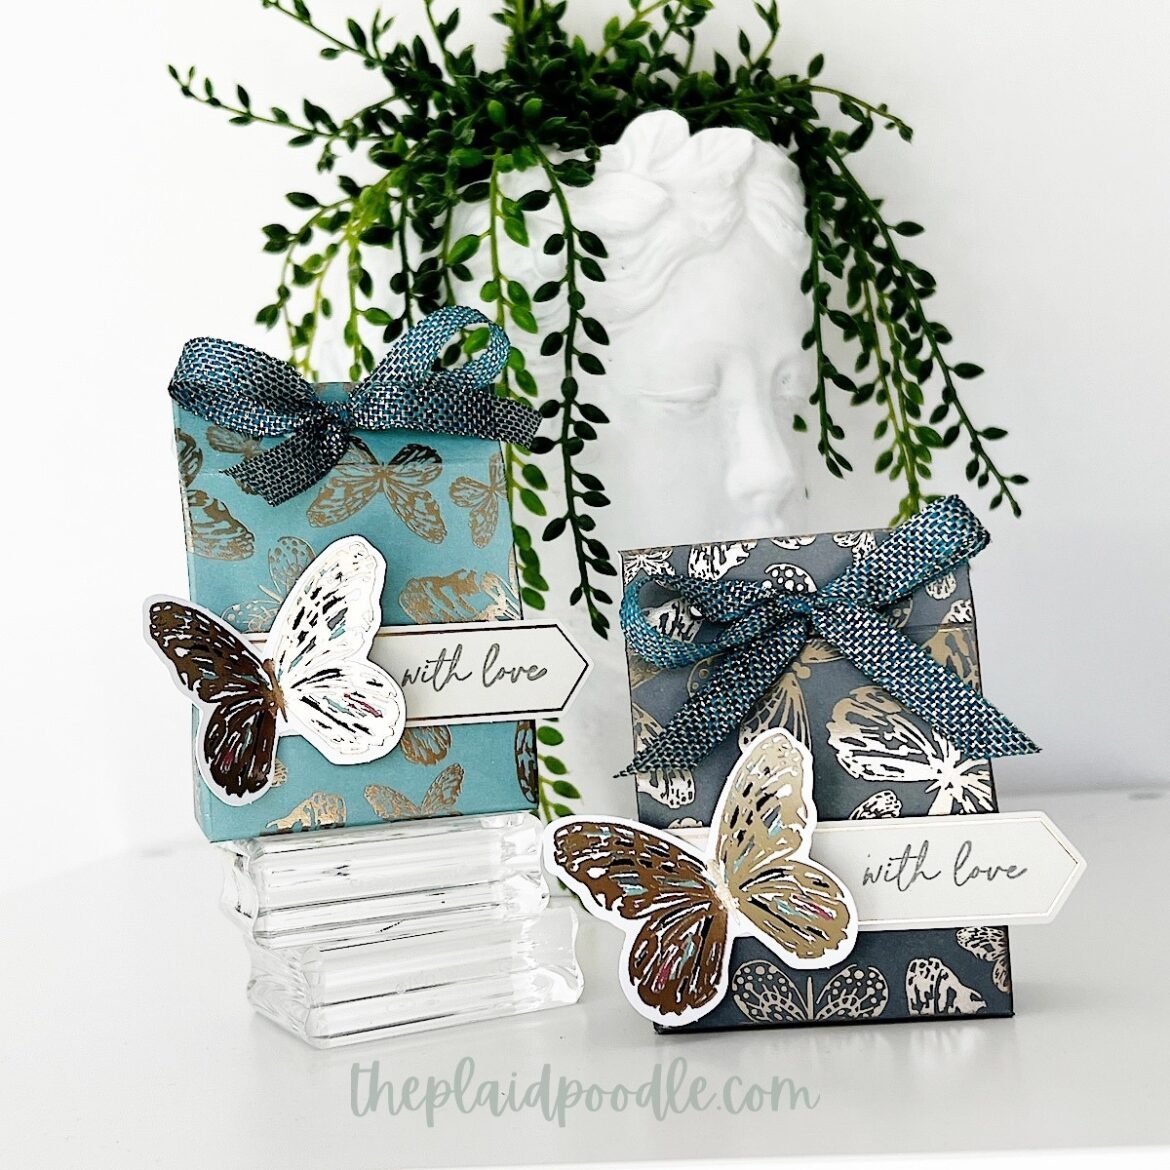
Mini Treat Bags with the Delicate Wings Paper Pumpkin Kit!
I’m always on the lookout for party favors for my card class guests. When the April Delicate Wings Paper Pumpkin Kit arrived, I knew the gold-embossed card bases would be perfect for mini treat bags. It was a fortunate coincidence…
-
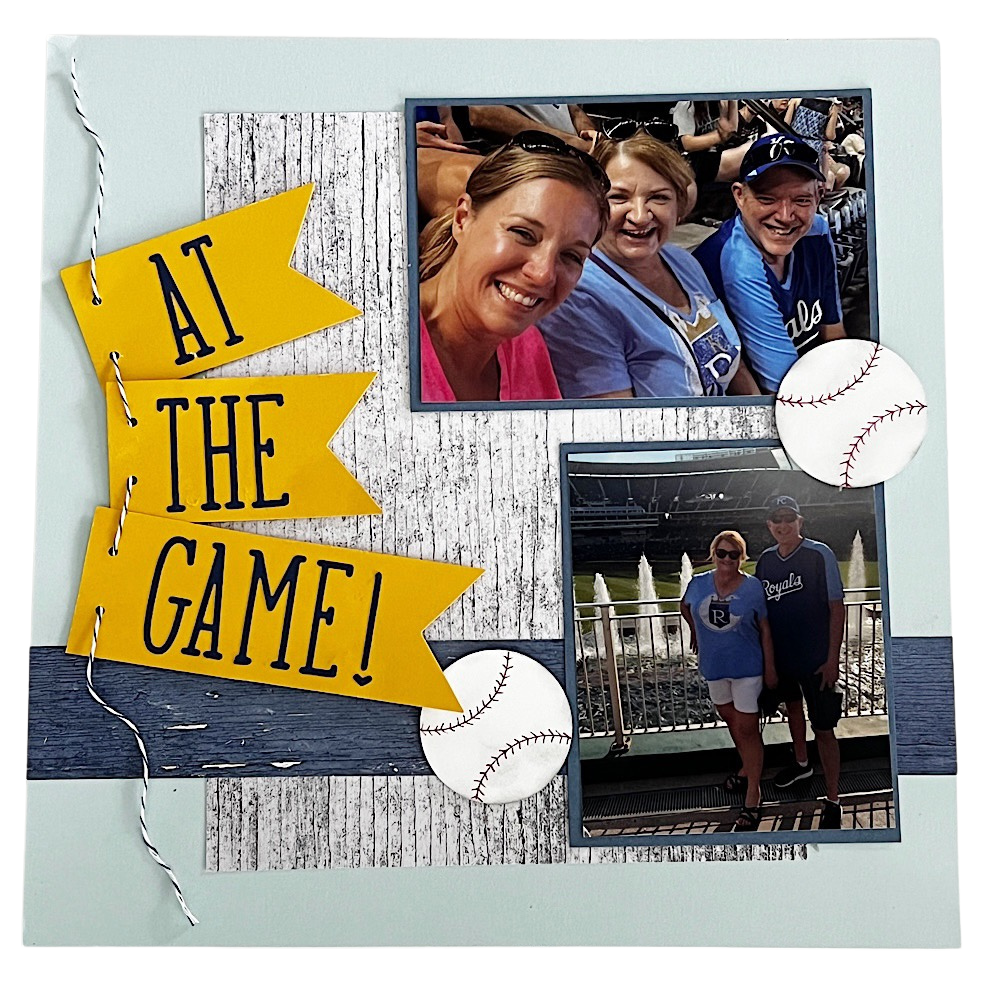
In My Scrapbook Era
Throughout the month of May, I’ve been sharing fun memory-keeping projects during my weekly livestreams. Last week I shared my process for creating a simple, one page layout. You can find all the details in the post linked here. In…
-

Let’s Make a Simple One-Page Scrapbook Layout
In the digital age, where every moment is captured on smartphones and stored in clouds, there’s something undeniably special about preserving memories through tangible means. Scrapbooking offers a fun way to preserve precious moments and share our memories. Today, I’m…