

-
A Polaroid-style card is a great option when I want to show off a beautiful designer series paper. The Polaroid frame is easy to cut when you use a stitched square die from the Stylish Shapes Dies from Stampin’ Up!…
-

Everything You Need to Know About Making a DIY Matchbook Card
I’m using the parameters given in Episode 162 of Craft Roulette to create my project today. What is Craft Roulette? It is a live papercraft challenge show where the goal is to create a project that has been randomly selected…
-
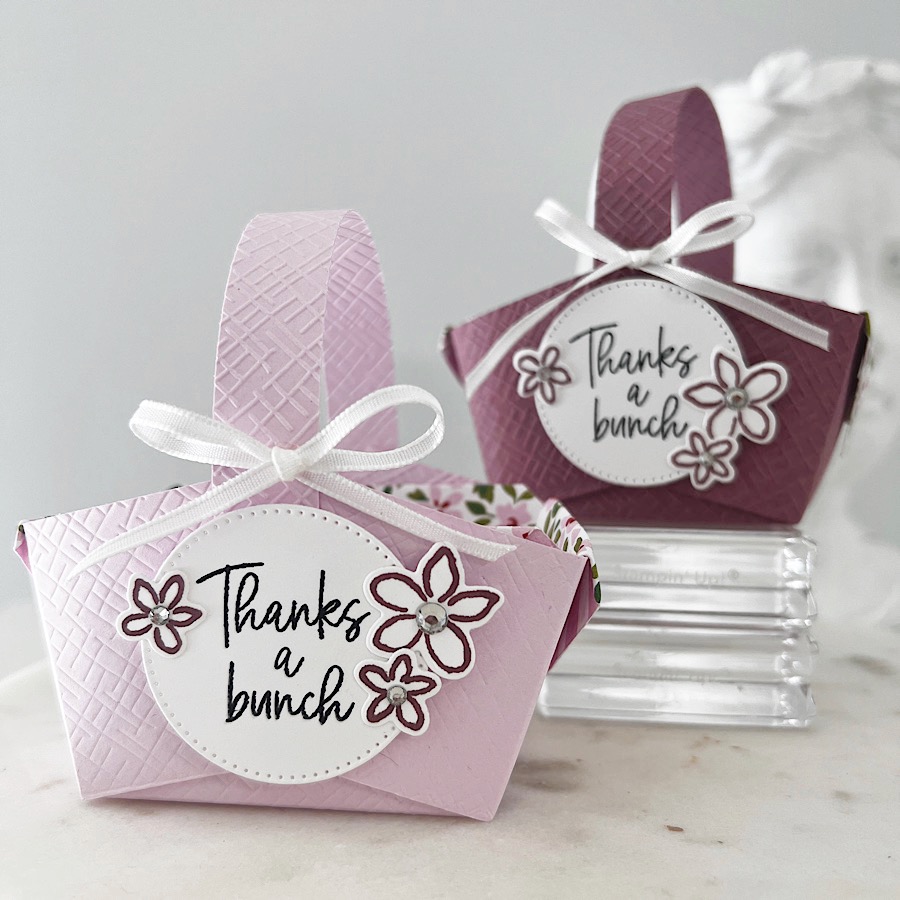
DIY Tutorial: How to Make a Lined Picnic Basket Party Favor for Mother’s Day
I’m making these cute lined picnic basket party favors for my Mother’s Day brunch. I’ve made these types of baskets before but have never lined them. The Delightfully Eclectic Designer Series Paper from Stampin’ Up! looks like a sweet fabric…
-

Learn Some Helpful Tips & Tricks for Making a Lattice Card
I ‘ve been seeing handmade lattice cards all over the internet and until now have been hesitant to give it a try. During a recent get together with some crafty card friends, one of them shared with me how to…
-

Get Ready for the ’23-‘Stampin’ Up! Annual Catalog: Sneak Peek of the Best Samples
The day we’ve been waiting for is finally here. The Stampin’ Up! ‘23-‘24 is live today! Sales from the new catalog begin today! The Fresh as a Daisy Suite from the new catalog is one of my favorites. I cased…