Monthly Archive: October 2014

12 Weeks of Christmas Week 4

Gorgeous Gift Tags!

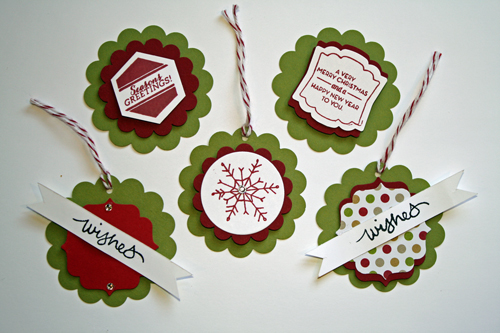
Christmas-Tags

For several years I have followed Organized Christmas’ Christmas Countdown, a free six week organization plan taking you through the holidays.  One of the assignments is to set up a designated area for holiday planning.  I call mine Christmas Central and everything I need to plan and prepare for the holidays is located at Christmas Central.  One of those items will be a stash of these gorgeous Christmas tags.  I’ll be pairing them with the Festive Designer Kraft Paper and some Cherry Cobbler and Old Olive trimmings.  Looking forward to having pretty gift packages this Christmas and a little puffed up because I can check “gift wrap supplies” off my holiday list!

These adorable tags use just bits of card stock and are a sinch to make using paper punches and stamps.  View the video below for instructions:


Products:

Stamps:  Endless Wishes, Christmas Tagables

Cardstock:  Old Olive, Cherry Cobbler, Whisper White

Ink:  Cherry Cobbler

Accessories:  2-3/8″ Scallop Circle Punch, 1-3/4″ Scallop Circle Punch, Artisan Label Punch, Hexagon Punch, 1-3/8″ Circle Punch, Stampin’ Dimensionals, Cherry Cobbler Baker’s Twine


Order Now Button_2-001

Halloween Treat Creature Feature

TRICK OR TREAT!

Halloween-Treat-Creatures

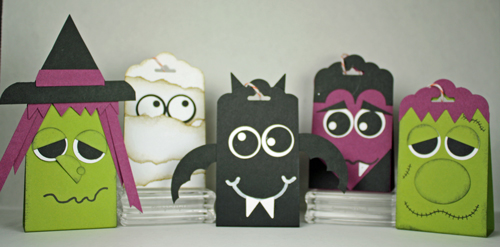
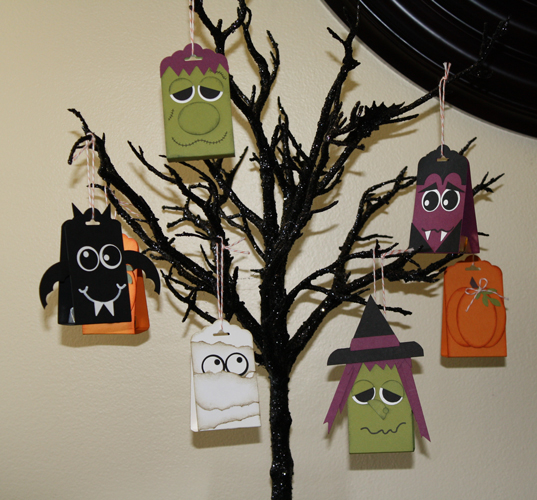
Aren’t these scary creatures just the cutest?  They’re not only adorable but they hold a delicious chocolate treat. Wouldn’t they make the sweetest party favors for the classroom, coworkers, neighbors and friends?! I hung them on this tree I found at Michael’s and placed them on my entry table ready to hand out to those special trick-or-treaters who show up on All Hallows Eve!
Halloween-Treat-Creatures-o

Directions:

Cardstock:  Basic Black, Pumpkin Pie, Whisper White, Old Olive, Elegant Eggplant

Ink:  Momento

Accessories:  Tag Topper Scallop Punch, 3/4″ Circle Punch, 1/2″ Circle Punch, Large Oval Punch, Small Oval Punch, Cupcake Builder Punch, Project Life Journaling Pens, Glue Dots

Treat Holder:  The treat holder is made using a piece of card stock measuring 2″ x 7-3/4″ that is punched on both ends with the Tag Topper Scallop Punch.  Score the strip of card stock at 3-3/8″ from each end, fold at the score lines then adhere the tag together at the top using Glue Dots.  The little slot in the middle of the tag is the perfect size for a chocolate nugget candy which I attached with a Glue Dot.

Faces:  The eyes are made using the 3/4″ Circle Punch for the eyeball and the 1/2″ Circle Punch for the iris.  I used the Cupcake Builder Punch for the small dots in the eyes.  For the witch’s and monster’s eyelids I used the 3/4″ Circle punch cutting the circle in half.  The witch’s nose is a 1/2″ circle cut in half with a small dot made from the Cupcake Builder Punch for her wart.  The monster’s nose is made using the Small Oval Punch.

Monster:  Frankie’s hair was made by punching a scrap of Elegant Eggplant cardstock with the Tag Topper Scallop Punch and fringing the other end with scissors then gluing it on the tag.  His mouth and scars were drawn with a Project Life Journaling Pen.

Witch:  The witch’s hair was made by punching a scrap of Elegant Eggplant cardstock with the Tag Topper Scallop Punch and fringing the other end with scissors then gluing it on the tag.  A few other strips of cardstock were then glued on the edges.  Her hat is a triangle with a rectangular strip of paper with two rounded corners made using the corner rounder punch.  The hat band was a smaller rectangle with rounded corners.  The witch’s mouth is drawn with a Project Life Journaling Pen.

Mummy:  The mummy is “wrapped” by using three 2″ strips of Whisper White cardstock that are torn and sponged on the edges using Momento ink then glued on.

Bat:  The bat’s wings are made using the Large Oval Punch and the 1/2″ Circle Punch.  His teeth and ears are small triangles and I drew his mouth with a chalk pen that I had in my stash.

Vampire:  The Count’s hair line was made by punching a scrap of Basic Black cardstock with the Tag Topper Scallop Punch and the 1/2″ Circle Punch.  His cape, teeth and eyebrows are made by cutting triangles.  The Count’s mouth is drawn with a Project Life Journaling Pen.
12 Weeks of Christmas – Week Three!!!

Gift Box Punch Board

This week’s project was made using the Stampin’ Up! Gift Box Punch Board.  It’s a fun element to add to holiday packaging, creating containers just right for that special gift.  Create boxes up to 4-inch square.  The sizing chart and instructions are even printed on the board making it a sinch to use!  View the video at the end of this post for a live demonstration of this nifty gadget! 

12-WKS-Christmas---WK-3

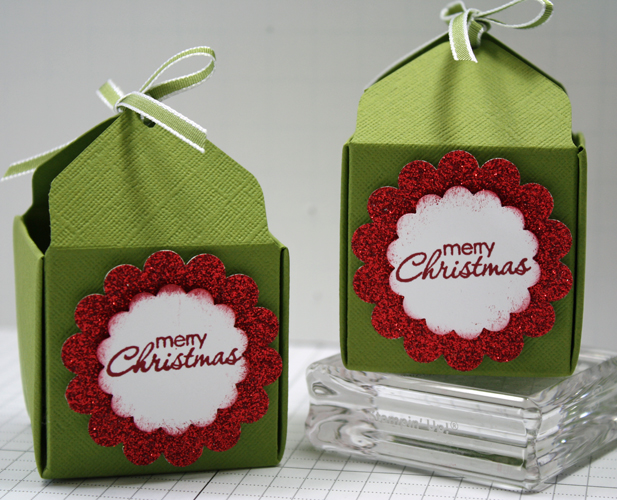
Aren’t these gift boxes cute?  They are the smallest measuring 1-3/4″ square.   I used a 6 x 6-inch piece of Old Olive Cardstock for the box and a scrap of Red Glimmer Paper and Whisper White Cardstock for the tag.  The Merry Christmas sentiment is from the Petite Pairs Stamp Set and was stamped using Cherry Cobbler Ink.  The box is tied together using 1/8″ Taffeta Ribbon in Old Olive.  I used the 1-1/4″ Scallop Circle Punch and the 1-3/4″ Scallop Circle Punch for the tag and used Stampin’ Dimensionals to assemble the tag and adhere it to the box.  View the video below for a full tutorial on how I assembled the boxes using the Gift Box Punch Board.


Order Now Button_2-001

Twelve Days of Christmas – Week Two!

Lovely As a Tree Card


Lovely-as-a-Tree-Card

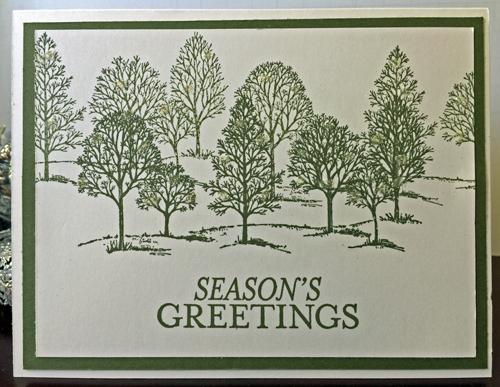
This card is made with a classic Stampin’ Up! stamp set, Lovely As a Tree.  Using the “stamp off” technique there appears to be a forest of trees.  The simple technique adds a lot of depth to the card giving it a rich look.  Extra drama was added with a sprinkling of Dazzling Diamonds on the tree branches giving the effect that they are frost covered.  The video below includes all the dimensions and techniques used in the making of this card.  

Products:

Stamps:  Lovely As a Tree 128655 (w) 127793 (c), Bright & Beautiful 135056 (w) 135029 (c)

Cardstock:  Whisper White 100730, Always Artichoke 105119

Ink:  Always Artichoke 126972

Accessories:  Dazzling Diamonds 133751


Order Now Button_2-001

Sweet Scarecrow Card & Memory Keeping Pages

Scary-Scarecrow

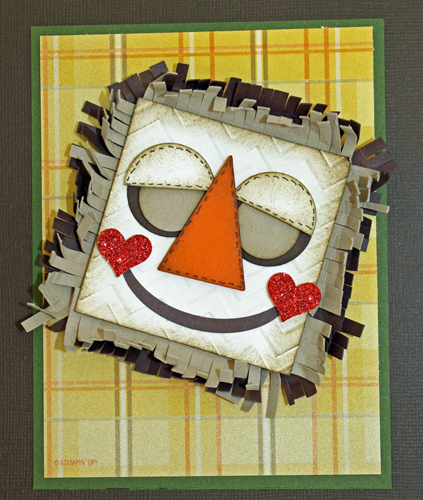
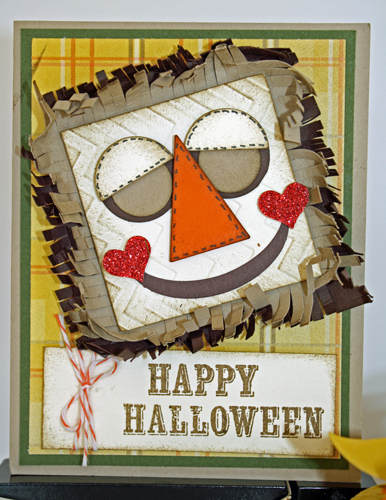
My thanks to fellow Stampin’ Up! Demonstrator Diana Ball for her original design that I CASED for this cute scarecrow!  I ended up making two of the darling faces and used one for a card and one for a scrapbook page layout:

Scary-Scarecrow-CardSweet Scarecrow Card


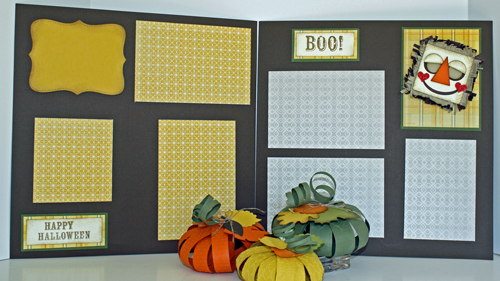
Scary-Scarecrow-Page-LayoutSweet Scarecrow Double Page Scrapbook Layout

Directions:

The scarecrow’s face is a 2-1/2″ x 2-1/2″ square of Very Vanilla Cardstock that I embossed with the Chevron Embossing Folder then sponged the edges with Early Espresso Ink.  The 1″ Circle Punch and the 3/4″ Circle Punch were used for her eyes and eyelids and the heart punch from the Itty Bitty Accents Punch Pack for her rosy cheeks.  I cut a triangle for her nose and used the Extra Large Oval Punch for her mouth.  Her eyelids, nose and cheeks are adhered using Stampin’ Dimensionals.    The “straw” surrounding her face was made with a 3-1/2″ x 3-1/2″ square of Crumb Cake and Early Espresso Cardstock that were fringed on the edges with Fringe Scissors.  I glued the two pieces of “straw” squares together with Snail Adhesive then attached the face to the “straw” with Stampin’ Dimensionals.

Introducing Twelve Weeks of Christmas!!!

Twelve Weeks of Christmas!!!

Today starts the beginning of twelve weeks of Christmas projects.  If you’ve looked at your calendars you will see that I’m already a week behind!  No worries, twelve total projects will be posted so stay tuned and look for a bonus post before jolly, old St. Nick arrives! Join my email list now to make sure you don’t miss a single one!

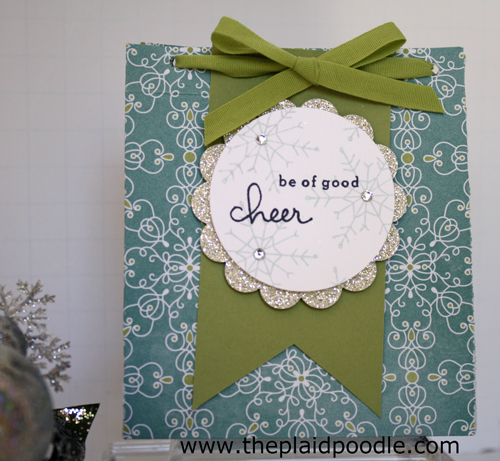
My first project in this series is this delightful little gift bag.  I think it’s the perfect size for a small cellophane bag of bath salts, tea light or votive candles, a gift card and candies or, of course, cash! 

12-Wks-of-Christmas-2014---

Directions (view the video below for a complete tutorial):

The bag is made with All Is Calm Designer Series Paper. I used a 12″ x 6″ piece of the DSP and scored it in landscape mode at 1-3/4″, 5-1/2″, 7-1/4″ and 11″.  Then, in portrait mode, I scored at 1-3/4″ and 5-1/2″.  For the tag I used the Endless Wishes Stamp Set, stamping the snowflakes with Soft Sky Ink and the sentiment with Black StazOn Ink onto a 2″ circle punched from Whisper White Card Stock. Using Stampin’ Dimensionals I attached the stamped circle to a 2-3/8″ scallop circle punched from Dazzling Diamonds Glimmer Paper.  The circles were attached with Dimensionals to a 2″ x 4″ piece of Pear Pizzazz Card Stock that I flagged at one end.  The tag is attached to the bag using Snail Adhesive.    Finally, the bag is tied up cute with Pear Pizzazz Cotton Ribbon and sprinkled with Rhinestone Basic Jewels.