Valentines Day

Monday Mini Papercrafting Classes are Here!

I’m excited to start something special, and I’d love for you to join me! I’ll be live on Facebook and YouTube every Monday morning at 10 am CT. Today was the premiere episode of Monday Mini Papercrafting Class. These free weekly sessions will highlight various card-making and papercrafting techniques.

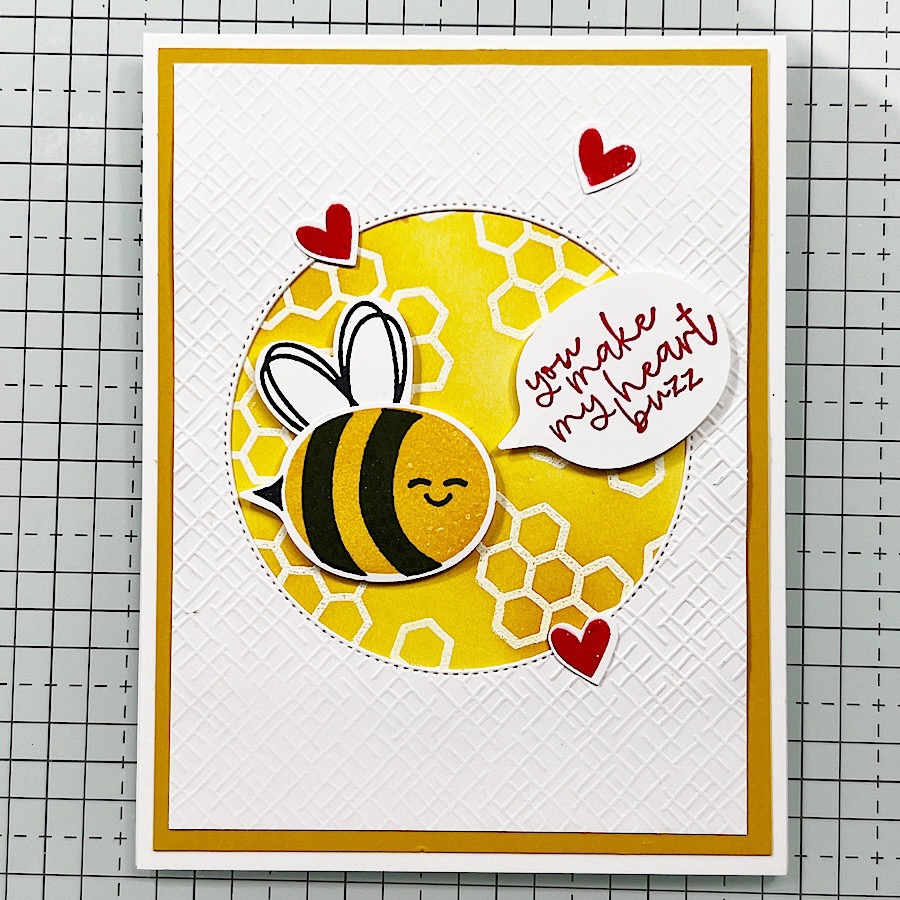
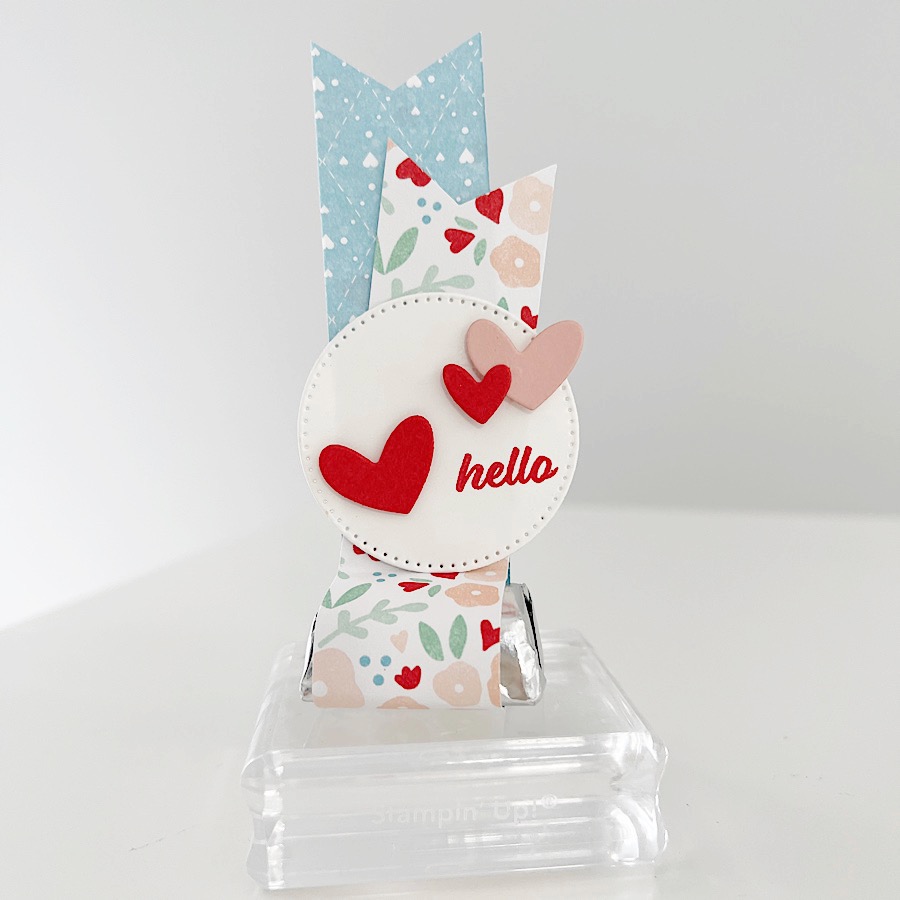
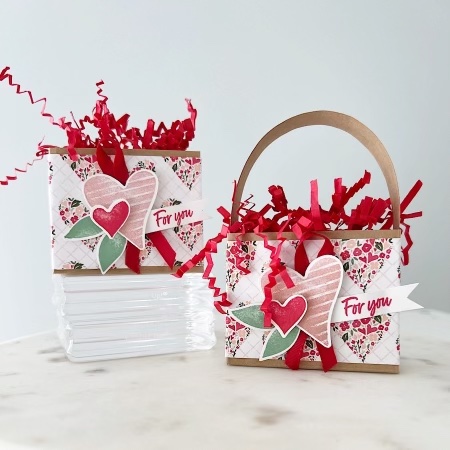
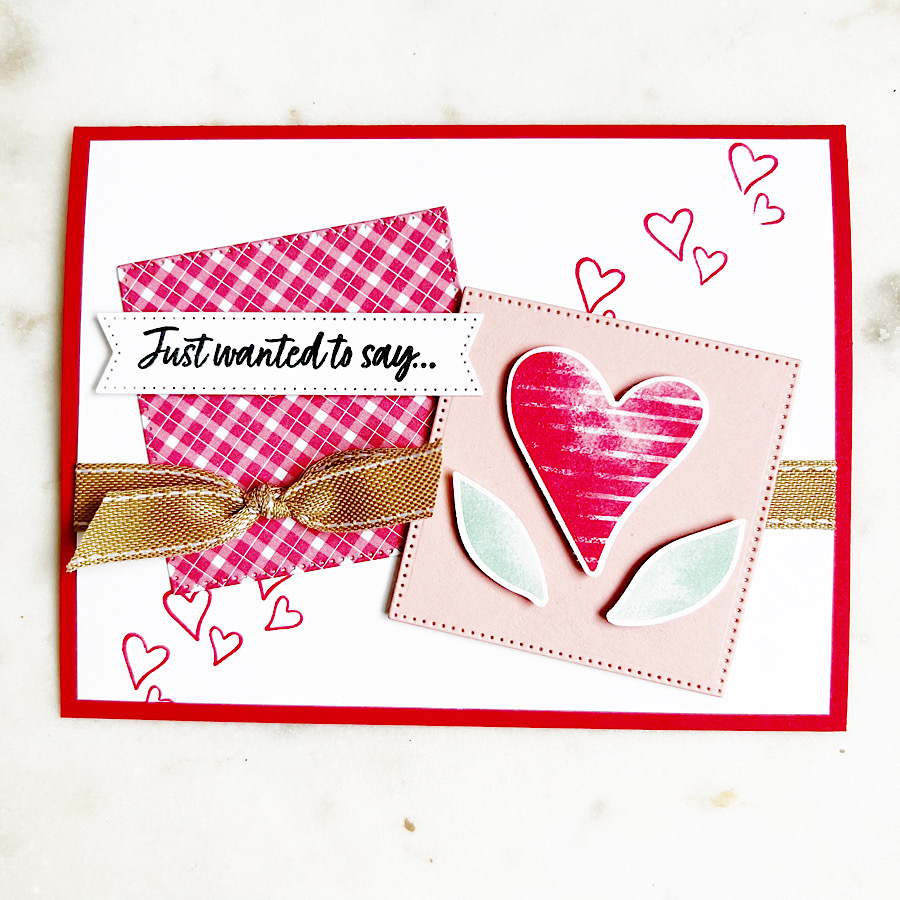
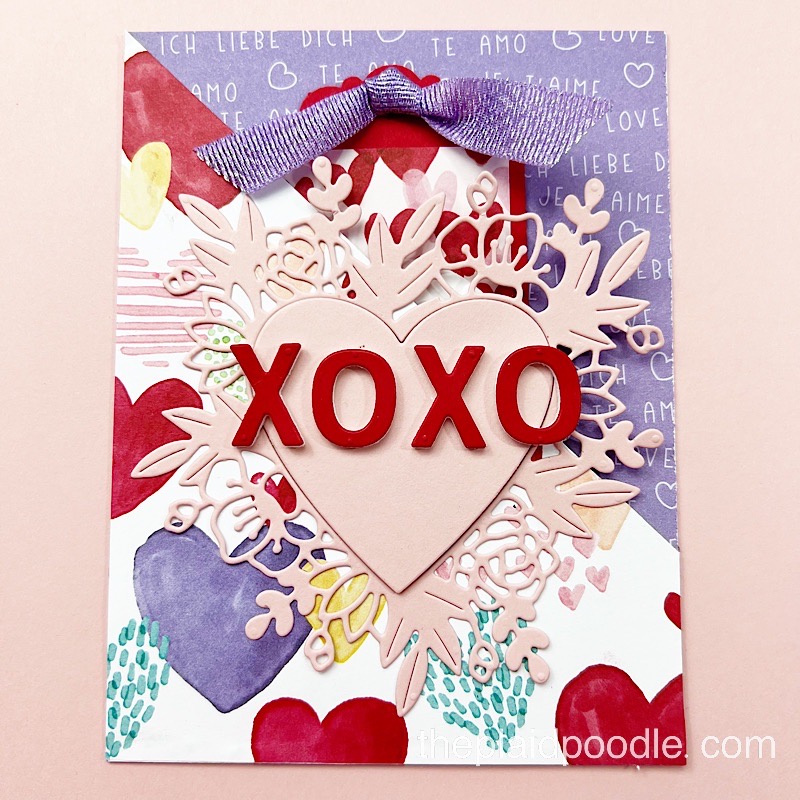
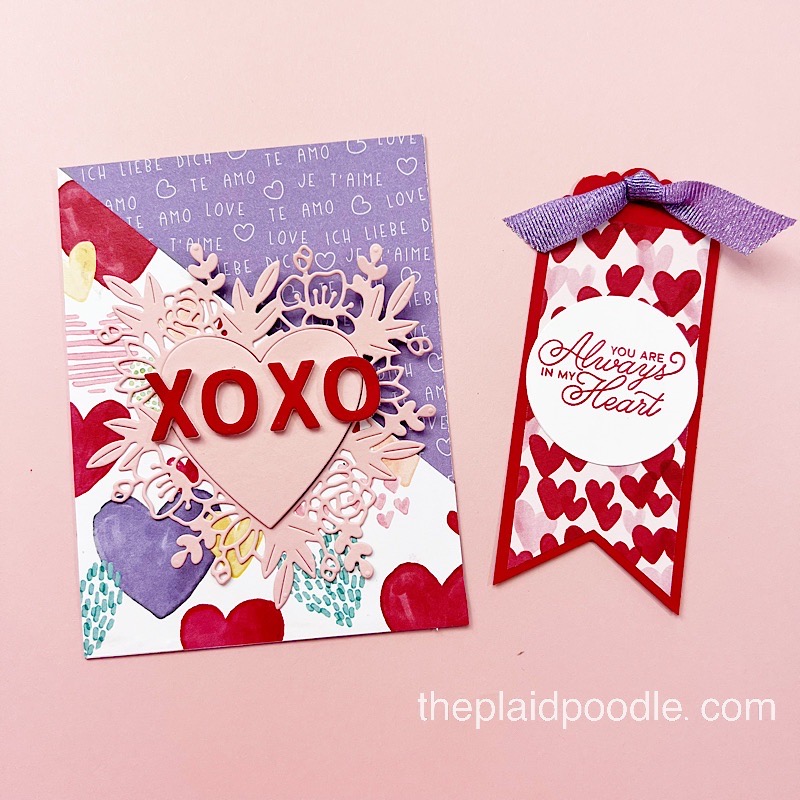
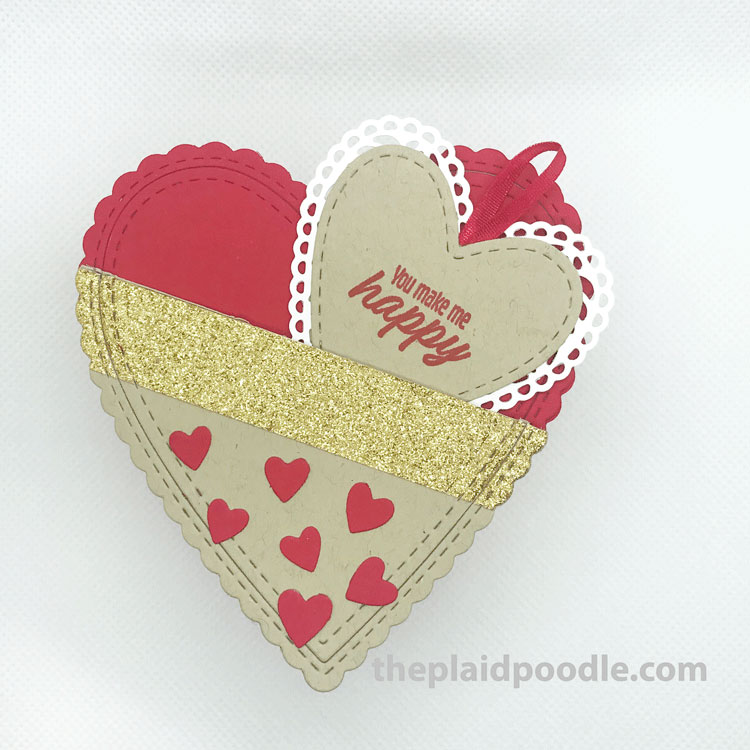
This January, I’m particularly thrilled to share one of my all-time favorite techniques! Get ready for a range of tips and tricks that you can easily apply using the supplies you already have. Today’s class looks at ink-blending with the emboss/resist technique. Here is the card I made during class using that technique.

You can watch the replay of today’s class here:

Product List

Make sure to subscribe to my page or channel so you don’t miss an episode. Grab your cup of coffee, and me live next Monday.

Facebook here: https://www.facebook.com/theplaidpoodle 

YouTube here: https://www.youtube.com/theplaidpoodle 

Also, if you’re local to Kansas City today is the last day to register for my Welcome 2024 In-Person Card Parties. Click here for more details and to complete your registration.

Make Three Quick & Easy Valentine’s Day Treat Holders

Valentine’s Day is just a few days away and I have three quick and easy Valentine’s Day treat holders to share with you.

I used the Peekaboo Treat Bags from Stampin’ Up! for the first Valentine’s Treat Holder. After adhering two strips of the Country Floral Designer Series Paper to the top and bottom of the bag, I added a sentiment tag. The tag is made with the Heart Punch Pack and then embellished with die-cuts from the Share a Milkshake dies.

The second quick and easy Valentine’s Treat Holder is this cute chocolate-topped ladybug. I used the Hello Ladybug Bundle from Stampin’ Up! as the base for a heart-shaped Dove chocolate.

The final quick and easy Valentine’s Treat Holder I’m sharing with you today is this wrapped Hershey’s Chocolate Nugget. It’s a 1″ x 8-1/2″ strip of Country Floral Designer Series Paper wrapped around the chocolate. I embellished it with a stitched circle die-cut topped with heart die-cuts.

Watch the video for step-by-step instructions for all three treat holders

Product List
Share A Milkshake Bundle (English)
Hello Ladybug Bundle (English)
Tuxedo Black Memento Ink Pad
Sweet Sorbet Classic Stampin' Pad
Heart Punch Pack
Stitched Shapes Dies
Peekaboo Treat Bags
Country Floral Lane 12" X 12" (30.5 X 30.5 Cm) Designer Series Paper
Basic White 8 1/2" X 11" Cardstock
Sweet Sorbet 8 1/2" X 11" Cardstock
Polished Pink 8 1/2" X 11" Cardstock
Balmy Blue 8-1/2" X 11" Cardstock
Basic Black 8-1/2" X 11" Cardstock
Multipurpose Liquid Glue
Mini Stampin' Dimensionals
Mini Glue Dots

Make a Dollar Tree Valentine Apothecary Jar

Today’s project is a fun, Valentine Apothecary Jar that I made using supplies from Dollar Tree. I purchased these small, plastic mason jars at my local Dollar Tree. I have also seen plastic apothecary jars in the Dollar Spot at Target which would be perfect for this project.

Make these easy jars for table favors, home decor, and coworker gifts. Use different colors for the embellishments and they would be beautiful for a wedding shower. I plan on using them as decoration on my treat table at my Galentine’s Card Party. If you’re local to the Kansas City area we would love to have you join us. See the party details by clicking on this link: https://bit.ly/3wW7om5

Product List
Heart Punch Pack
Share A Milkshake Bundle (English)
Country Bouquet Photopolymer Stamp Set (English)
Real Red Classic Stampin' Pad
Polished Pink Classic Stampin' Pad
Stamping Sponges
Balmy Blue 8-1/2" X 11" Cardstock
Real Red 8-1/2" X 11" Cardstock
Polished Pink 8 1/2" X 11" Cardstock
Basic White 8 1/2" X 11" Cardstock
Baker's Twine Essentials Pack
Heat Tool (Us And Canada)
Mini Stampin' Cut & Emboss Machine
Multipurpose Liquid Glue
Mini Stampin' Dimensionals

Make a Valentine’s Treat Box

We’re already in the middle of January so it’s not too soon to start making Valentine projects. The sweet Valentine’s Treat Box project I’m sharing today is a quick and easy craft to put together.

The Valentine’s Treat Box is 2-3/4″ wide, 1-1/4″ deep, and 2-1/4″ tall. I was able to fit four Ghirardelli chocolates in the box. That’s a perfect sweet treat for Valentine’s! There are many occasions to gift this Valentine’s Treat Box. I think it would make a lovely teacher gift, coworker gift, book club treat, or table favor at your Galentine’s party!

I couldn’t decide if the Valentine’s Treat Box needed a handle or not so I made one of each. Which one do you prefer?

The Valentine’s Treat Box started with a box I made using Kraft Paper. I then chose the Country Floral Lane Designer Series Paper from Stampin’ Up to wrap around the box. Finally, I used the Country Bouquet Bundle to embellish the front of the box.

Here is another project I made using the bundle. You can view it HERE.

Cutting & Scoring Diagram

Score a 5-3/4″ x 5-1/4″ piece of Kraft cardstock at 5-3/4″ x 5-1/4″ at 2-1/4″ and 3-1/2″ on the 5-3/4″ side. Score at 1-1/4″ and 4″ on the 5-1/4″ side.

Product List

Make an Always in My Heart Valentine Pocket Card

It’s Valentine’s Week and time is running out for me to share all my heart love projects! The card I’m sharing today is, like most Valentine cards are, over-the-top with lots of layers, patterns, frills, and glitter.

I used the Always in My Heart stamp set along with the coordinating Floral Heart dies from Stampin’ Up! to create this pocket card. The stars of the show are the fun Sweet Talk Designer Series Paper and that lovely floral heart die-cut. The sentiment tag that tucks inside the pocket makes a sweet bookmark.

Product List

Pocket Card Cutting Guide

Card base = 4-1/4″ x 5-1/2″

First Layer = 4-1/4″ x 5-1/2″

Pocket Layer = 4-1/4″ x 5-1/2″

Make an Always in My Heart Valentine Card

I can’t believe we’re already halfway through January, 2022! Time just needs to stand still for a minute. Am I right? With Valentine’s Day coming at us quickly I needed to focus on the cards I want to send this year. I have the Always in My Heart stamp set and coordinating Floral Heart Dies from Stampin’ Up! sitting on the shelf in my craft room and they were calling out to me, “use us, use us”, so that is what I did.

The heartfelt sentiments in the stamp set make them perfect for Valentine’s Day, wedding, and anniversary projects. This is a Two-Step Stampin’ set; it allows you to layer two or more images to create one final image with extra texture and dimension in the colors you want.

Here is another card that I made using the piece left after die-cutting the heart from the Flowering Fields Designer Series Paper.

Product List

How to Make a Valentine Treat Holder

Sure a simple reclosable plastic bag can do the job of keeping your Valentine treats fresh, but why not package them up in a sweet little bag and pop a cute tag on it?!

I recently made up a few chocolate covered marshmallows using a few products that I picked up at the grocery store.

  • Large Marshmallows
  • Chocolate Candy Melts
  • Cake Pop Sticks
  • Candy Sprinkles

To make the chocolate covered marshmallows I inserted cake pop sticks into large marshmallows and dipped them into melted chocolate candy melts. Next, I sprinkled the dipped marshmallows with nonpareils sprinkles then set them onto wax paper to harden. That’s it! Easy-peasy.

I packaged the treats up using Stampin’ Up!’s new food safe 3″ x 9″ Printed Gusseted Cellophane Bags. Watch the video tutorial below to see how I created that sweet little tag.

Product List

Make a Mini Valentine Chocolate Box

Every Monday I host a Make it Monday Facebook Live where I share a fun project that is not a card. This week I showed how to make this sweet miniature heart chocolate box. Make sure to follow me on Facebook here https://www.facebook.com/theplaidpoodle so that you don’t miss an episode.

I created this box last year using the Stitched Be Mine Dies that has a square box as its base. You can view the directions for this box HERE.

This year however, I saw a box that Angie over at Stamping with Amore created using a heart-shaped base and I knew I had to give it a try. I took Angie’s base design and pared it down to fit with the new Heart Punch Pack from Stampin’ Up!

These mini chocolate boxes are adorable and would make great little class favors and using a sheet from the From My Heart Specialty Designer Series Paper you can whip up 25 boxes in no time!

The project supplies and directions are here. To view the video tutorial hop on over to my Facebook page here: https://www.facebook.com/theplaidpoodle/videos/658627391341534/

Directions:

Real Red Cardstock = 6-1/8″ x 1-1/2″, two pieces 3″ x 3-1/2″ each, Whisper White Cardstock = 3″ x 3-1/2″ and From My Heart Specialty Designer Series Paper

Product List
Simply Scored
$30.00
Bone Folder
$7.00

Make it Monday!

I’m so excited to start 2020 with a new series I’m calling Make it Monday! I love making cute treat holders and lovely home decor using stamps, paper and ink and can’t wait to share these projects with you. I’ll be going live every Monday on my Facebook Page with a fun 3-dimensional project.

Today’s Make it Monday project was this sweet candy jar made using a Ball mini storage jar. I purchased the jars in a box of four at one of our big-box stores then embellished them using the Meant to Be Stamp Set from Stampin’ Up!

DIRECTIONS

  • Place Tear & Tape Adhesive on both ends of 6″ x 1-1/4″ piece of Designer Series Paper then wrap around mini storage jar.
  • Place Mini Glue Dots on both ends of 6″ length of ribbon and wrap around center of Designer Series Paper on the jar.
  • Wrap two – 12″ lengths of ribbon around neck of jar and wrap in a double bow.
  • Cut filigree heart from 2-3/4″ x 2-3/4″ piece of Balmy Blue card stock.
  • Stamp sentiment onto 2-1/2 x 2-1/2″ piece of Whisper White card stock using Memento ink. Cut out with heart die. Adhere stamped heart behind filigree heart using Multi-Purpose Liquid Glue. Adhere tag to front of jar using Tear & Tape Adhesive.
  • Cut circle from 2-1/8″ x 2-1/8″ piece of Balmy Blue card stock. Cut stitched circle from 2″ x 2″ piece of Designer Series Paper. Adhere stitched circle onto Balmy Blue circle using adhesive. Adhere both circles to lid on jar using adhesive.
Product List

Visit my Facebook Page to watch the replay of today’s Make it Monday! and don’t forget to click on “Like” and “Follow” so you won’t miss another episode!

Valentine Chocolate Box


I made this adorable little heart shaped box during my Facebook Live Coffee and a Card last week. I patterned it after a box of chocolates I received from my husband to celebrate the anniversary of our first date. I talk all about that first date during the Facebook Live. You can hear all about it if you care to watch the replay of the video found in this post below.

Here is the box of chocolates that was my inspiration for this project:

I thought it was so clever that the box had a pocket on the lid to insert a card into and knew right away that I wanted to make something similar only on a smaller scale. The Be Mine Stitched Framelit dies from Stampin’ Up! helped me achieve my goal beautifully!

Below is the list of supplies I used for this Valentine Chocolate Box project along the Facebook Live Video tutorial and a scoring/cutting diagram for the box.

I hope you enjoy today’s project and feel free to contact me if I can assist you with any of your paper crafting needs

Product List
Meant To Be Cling Stamp Set
Real Red Classic Stampin' Pad
Real Red 8-1/2" X 11" Card Stock
Crumb Cake 8-1/2" X 11" Card Stock
Whisper White 8-1/2" X 11" Card Stock
Simply Scored
Detailed Trio Punch
Big Shot
Precision Base Plate
Be Mine Stitched Framelits Dies
Big Shot Die Brush - New Configuration
Real Red 1/8" (3.2 Mm) Solid Ribbon
Silicone Craft Sheet
Stamping Sponges
Liquid Multipurpose Glue

Meant to Be Valentine Card

Sometimes the best things are simple things and that is certainly true for this card. Lots of white space that highlights the Balmy Blue fourish, the Lovely Lipstick heart and the Flirty Flamingo ribbon.

Simple doesn’t mean boring. This card has color, pattern, texture and a little bit of glimmer from the ribbon. And although the occasion is for Valentine’s Day, by changing up the sentiment, this card would be great for birthday, wedding, thank you and thinking of you cards. Gotta love the versatility!

Click on the button for a FREE full-color project sheet then watch my video to see how fast and easy this simple card is to make.


Product List
Meant To Be Cling Stamp Set
Tuxedo Black Memento Ink Pad
Whisper White 8-1/2" X 11" Thick Cardstock
All My Love 12" X 12" (30.5 X 30.5 Cm) Designer Series Paper
Lovely Lipstick 8-1/2" X 11" Cardstock
Balmy Blue 8-1/2" X 11" Cardstock
Big Shot
Be Mine Stitched Framelits Dies
Flourish Thinlits Dies
Big Shot Die Brush - New Configuration
Silicone Craft Sheet
Stamping Sponges
All My Love Ribbon Combo Pack
Liquid Multipurpose Glue
Stampin' Dimensionals
Glue Dots

Meant to Be Chocolate Box

Today’s project is this elegant little box that is the perfect size for three Ferrero Rocher chocolates. One of my favorite things about this box is the design. This box is very substantial and because of the folds used, has nice finished edge.

There is some scoring and cutting involved that can be a little tricky. I’ve included a scoring and cutting diagram in the project sheet. That, along with the video tutorial below should make this box a breeze for you to make.

You’ll notice that one of my comments on the video suggests that I had a problem with the ribbon pull. I would recommend a stronger adhesive to adhere the ribbon ends to the inside of the box. Another solution would be to tie the ribbon ends together in a knot to keep them from pulling out of the box.

Click on the button to view and download the Meant to Be Chocolate Box Project Sheet.


Product List

Bloomin’ Love

IMG_1375

So it’s no secret that the majority of us are smack-dab in the middle of a very long, dark and cold winter.  I’m literally huddled over my space heater as I type this post.  There is certainly not a bud or bloom in sight so why not distract ourselves from the harshness of it all and let a little love bloom?

Romantic love is nice if you can get it but I’m thinking more along the lines of being a kinder, gentler people.  I’m suggesting we throw a little Bloomin’ Love around.

My Bloomin’ Love project tutorial today is perfect for that purpose.  What better way to put a smile on someone’s face than with a pretty box that’s filled with chocolate?  Who wouldn’t love receiving one of these cute little favors?  Sneak them onto your co-workers’ desks, tuck them into a friend’s purse when she’s not looking, leave one in the mailbox for your letter carrier or set them at each place-setting during your family meal.

Check out the video tutorial below and let me know if you make any and how you used them to brighten someone’s day!

Click on any of the images below to purchase the products used in this tutorial.