Holidays

Make an Interactive Easter Card

Welcome to the first Monday of February, marking the beginning of a new theme for my Monday Mini Card-Making Livestreams! Throughout this month, I’ll be demonstrating various techniques for crafting interactive cards.

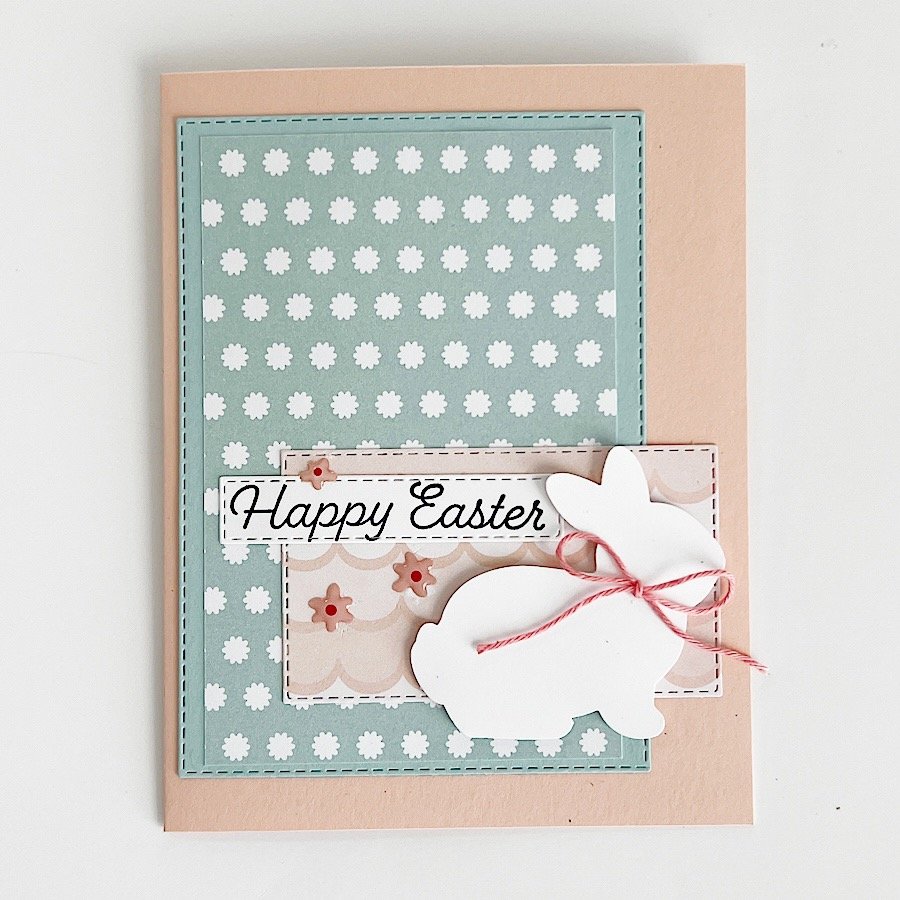
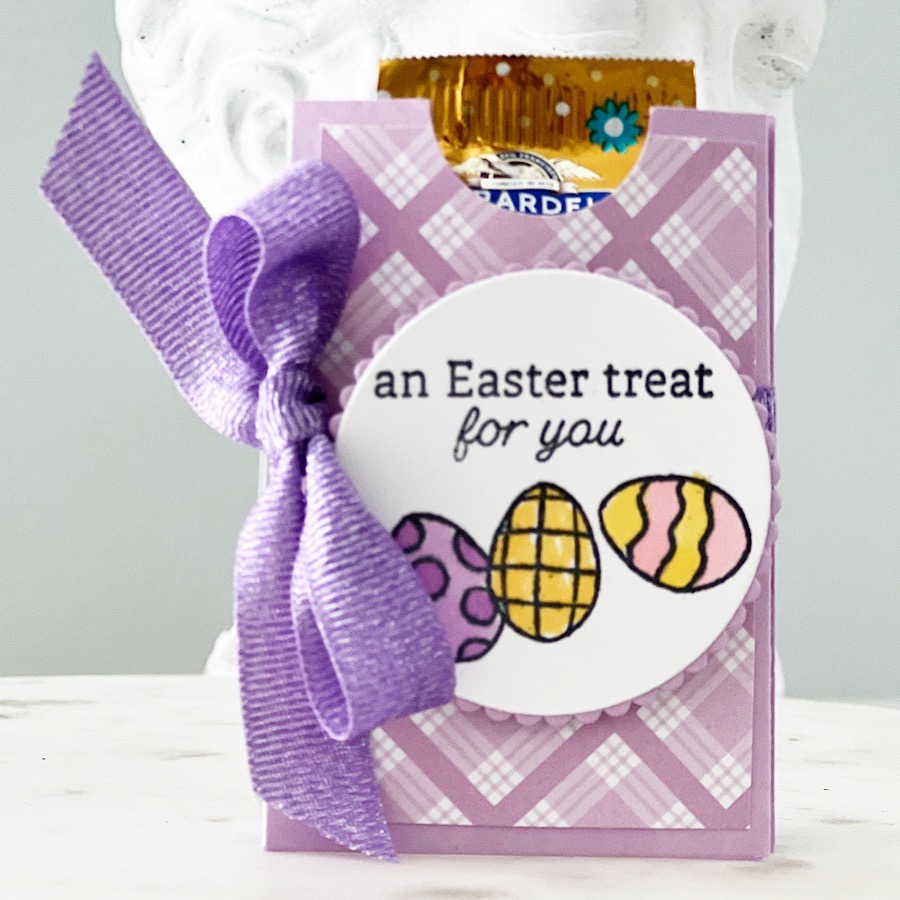
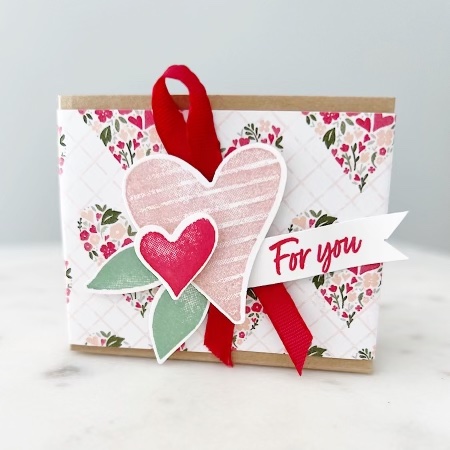
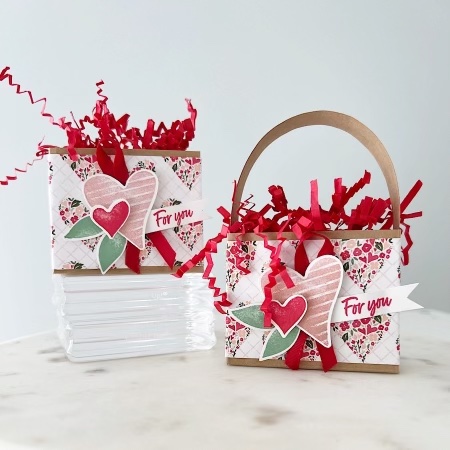
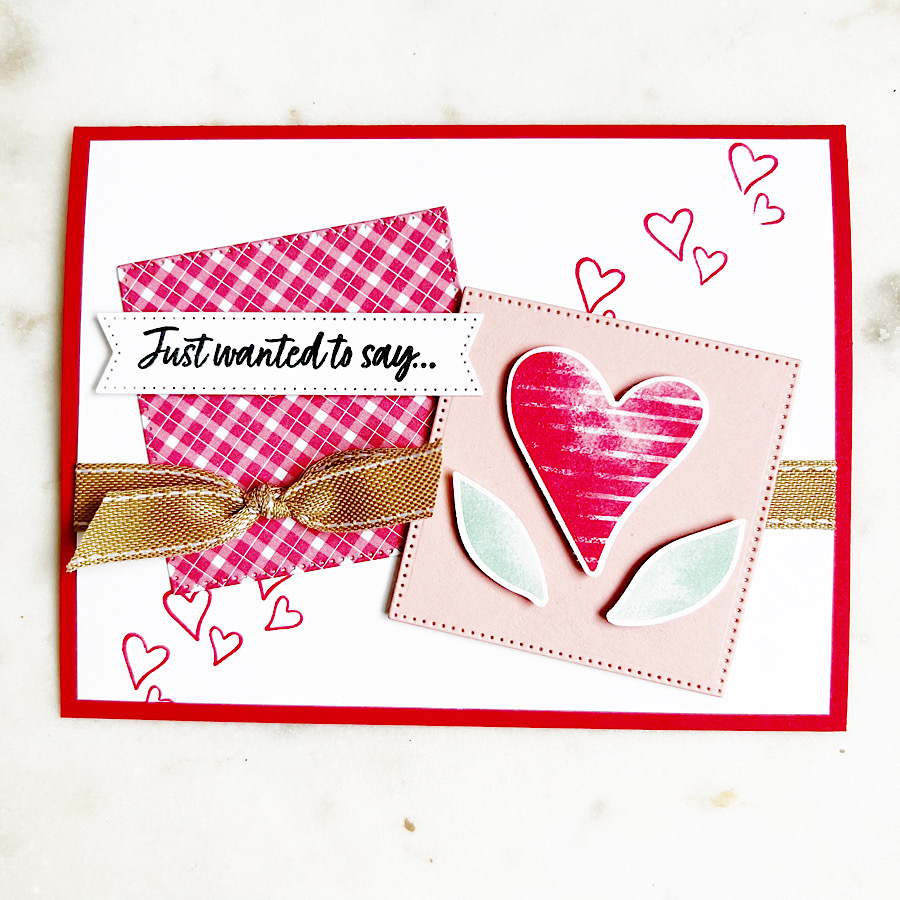
In today’s livestream, I showcased an Easter card featuring the adorable Easter Bunny stamp set and Bunny Punch from Stampin’ Up! However, feel free to replicate this card using the showcased technique with any crafting products you may already have.

When you open the card, this sweet ink-blended bunny magically pops up, adding an extra touch of charm and creativity to the card.

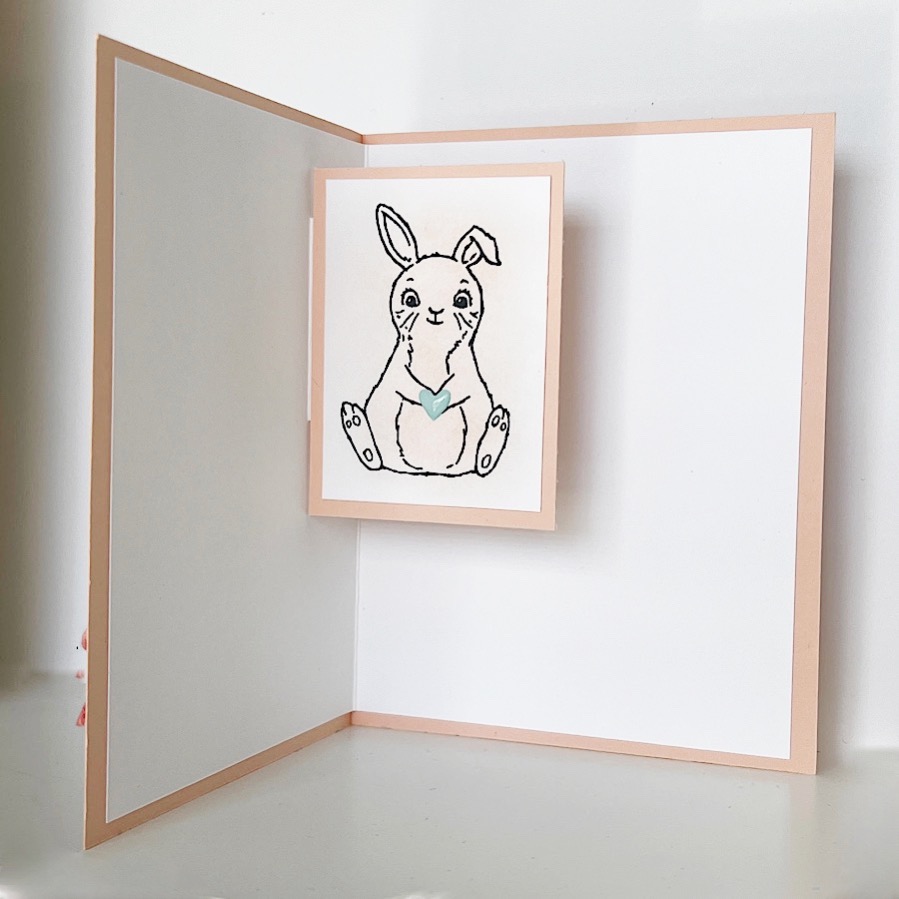
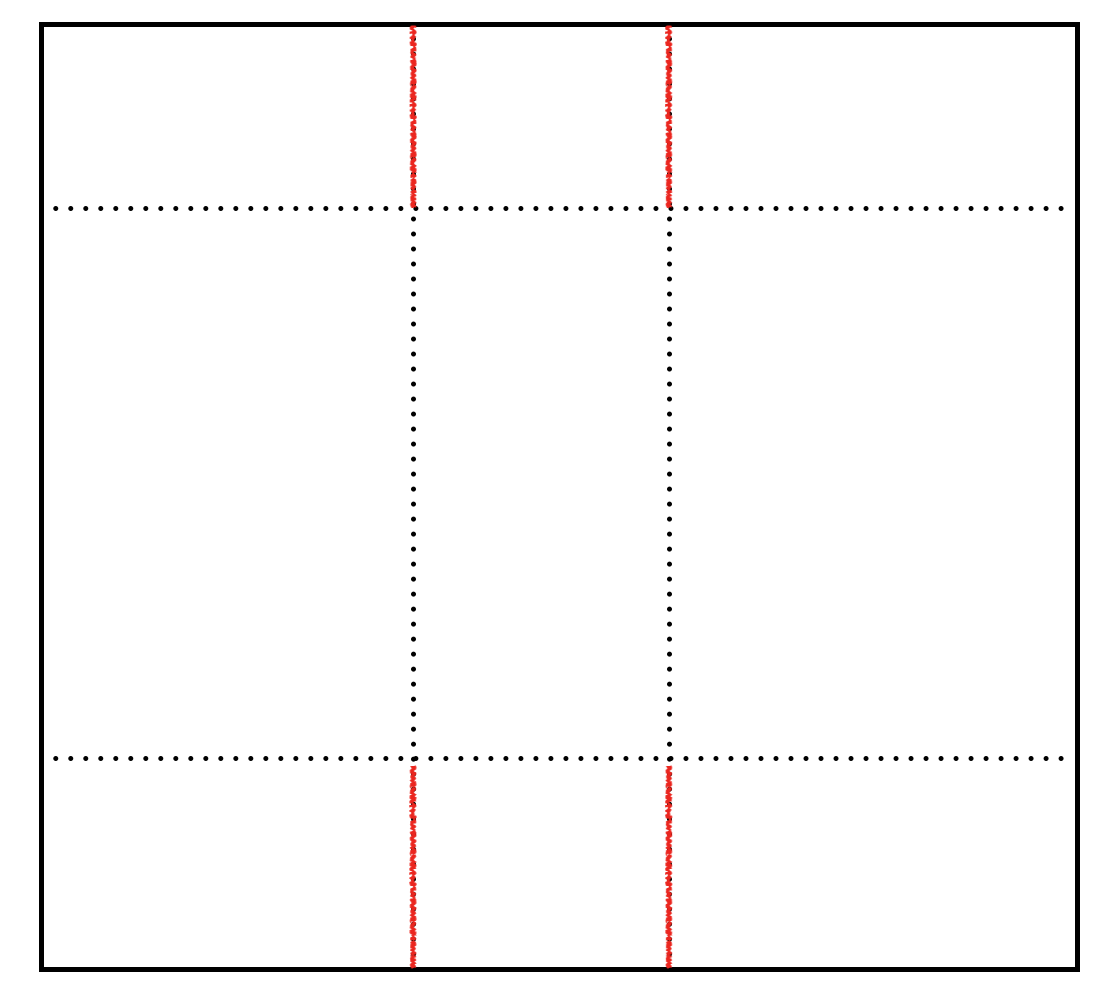
The pop-up insert is easy to create using a paper trimmer or scissors. For a step-by-step demonstration, feel free to watch the replay of today’s mini card-making class below to see how I make this charming Easter card come to life!

Product List

Interested in receiving a free project sheet of today’s card? Sign up for my Tuesday Tutorials! It’s free and easy to do, just hit up this link.

Don’t miss a Monday Mini Papercrafting Class episode – subscribe to my page or channel. Grab your coffee and hang out with me live next Monday! ☕️🎉

Facebook here: https://www.facebook.com/theplaidpoodle 

YouTube here: https://www.youtube.com/theplaidpoodle 

Monday Mini Papercrafting Classes are Here!

I’m excited to start something special, and I’d love for you to join me! I’ll be live on Facebook and YouTube every Monday morning at 10 am CT. Today was the premiere episode of Monday Mini Papercrafting Class. These free weekly sessions will highlight various card-making and papercrafting techniques.

This January, I’m particularly thrilled to share one of my all-time favorite techniques! Get ready for a range of tips and tricks that you can easily apply using the supplies you already have. Today’s class looks at ink-blending with the emboss/resist technique. Here is the card I made during class using that technique.

You can watch the replay of today’s class here:

Product List

Make sure to subscribe to my page or channel so you don’t miss an episode. Grab your cup of coffee, and me live next Monday.

Facebook here: https://www.facebook.com/theplaidpoodle 

YouTube here: https://www.youtube.com/theplaidpoodle 

Also, if you’re local to Kansas City today is the last day to register for my Welcome 2024 In-Person Card Parties. Click here for more details and to complete your registration.

Make a Circle Shaped Christmas Card with Forever Forest

Making a custom circle-shaped Christmas card is an excellent way to show your loved ones how much you care this holiday season! This card I’m sharing with you is a bit more formal, but you can always customize it by choosing products that reflect your own personality. The secret to a fantastic Christmas card is to make it your own. Have a blast with it, use your imagination, and your friends and family will be amazed with your unique circle-shaped Christmas cards!

Watch this video for the step-by-step instructions to create your own circle-shaped Christmas card!

Product List

Make a Bag of Bones Fun-Fold Halloween Card

Hey there, fellow cardmakers! We’re always on the hunt for cool new folds to jazz up our creations. Today, I’m super stoked to share this super easy-to-make card with you! You can totally customize the fold to match any occasion you’ve got coming up.

I used products from Stampin’ Up! Them Bones Suite for my card and oh boy, it turned out spooktacular! Check out this step-by-step video tutorial on how to create your own creepy-cool card

Cutting & Scoring Guide

Card Base = 5-1/2″ x 4-1/4″ piece of Thick Basic White Cardstock

Small Card Base = 5-1/4″ x 4-1/4″ scored at 2″ on the 5-1/4″ side.

Them Bones Designer Series Paper: 4 x 5-1/4″, 3″ x 4″, 1-3/4″ x 4″

Basic Black Cardstock = 3″ x 3″, scrap

Basic White Cardstock = two pieces 2-1/2″ x 2-1/2″ each.

———————— Supplies ———————— • Bag Of Bones Bundle (English) —— https://bit.ly/3PS6AZA • Tuxedo Black Memento Ink Pad —— https://bit.ly/33BmKPv • Them Bones 12" X 12" (30.5 X 30.5 Cm) Designer Series Paper —— https://bit.ly/3LkZCtn • Basic White 8 1/2" X 11" Thick Cardstock —— https://bit.ly/2LxIk0z • Basic Black 8-1/2" X 11" Cardstock —— https://bit.ly/3iyayDn • Deckled Circles Dies —— https://bit.ly/3ZxqImY • Paper Trimmer —— https://bit.ly/2YyAEhY • Mini Stampin' Cut & Emboss Machine —— https://bit.ly/3hNoXfu • Bone Folder —— https://bit.ly/3bfwe4p • Take Your Pick —— https://bit.ly/3pTTOK9 • Stampin' Seal —— https://bit.ly/39XGVrX • Multipurpose Liquid Glue —— https://bit.ly/33UUbfM

How to Create a Bag of Bones Halloween Treat Holder

October is less than a week away and it’s time to get busy with our Halloween crafting! I’ve got a cute Halloween treat holder project to share with you today to get you started.

The Bag of Bones Halloween treat holder is large enough to hold a fun-sized candy bar or two mini Twix Bars.

The Glow-In-The-Dark Bats & Ghosts are adorable and here’s proof that they do, in fact, glow!

My VIP email subscribers will receive a step-by-step project sheet for the Bag of Bones Halloween treat holder tomorrow. If you would like to receive exclusive project recipes from me I would be happy to add you to my VIP list. It’s easy and it’s free. Sign up here: bit.ly/46mJUGi

Product List
Bag Of Bones Bundle (English)
$51.25
Versamark Pad
$9.50
Them Bones 12" X 12" (30.5 X 30.5 Cm) Designer Series Paper
$12.50
Gray Granite 8-1/2" X 11" Cardstock
$10.00
Basic Gray 8-1/2" X 11" Cardstock
$10.00
Glow In The Dark Bats & Ghosts
$8.00
Stampin' Dimensionals
$4.25
Multipurpose Liquid Glue
$5.50
Stampin' Cut & Emboss Machine
$128.00

Step-by-Step Guide: How to Make a Fun-Fold Halloween Card

It’s September and that means it’s time to start your fall holiday crafting! Halloween will be here before we know it so I’m busy getting started on those projects. I made this fun-fold Halloween Card today during my Make-it-Monday Livestream.

I used traditional Halloween colors and the Them Bones Designer Series Paper for the card base and all the layers. I used dies from the Tricks & Treats Dies to make the cute candy corn die-cuts for the front flap of the card.

I think my favorite thing about this fun-fold Halloween card is the buffalo check ribbon embellishment. I colored the Very Vanilla squares in the ribbon with a Pumpkin Pie Stampin’ Blend. The sentiment tag with ribbon tie fills out the front flap of the card and adds some texture.

Cutting & Scoring Guide

  • Card Base = 6-1/2″ x 5-1/2″ piece of Basic Black Cardstock scored at 4-1/4″ on the 6-1/2″ side
  • Pumpkin Pie Cardstock = 5-1/4″ x 2″ and 2-3/4″ x 3-1/4″
  • Basic Black Cardstock = 3-1/2″ x 3-1/2″ scored at 1/2″ on one side
  • Basic White Cardstock = 4″ x 5-1/4″,
  • Scraps of Basic White, Pumpkin Pie, and Cajun Craze cardstock
Product List

Make an Easter Bunny Pocket Treat Holder

Today’s Make-it-Monday project is this Easter-themed treat holder. It’s a mini pocket that the cute, Ghirardelli Chocolate Bunny candies can be tucked inside. I was inspired to make these treat holders by a fellow Stampin’ Up! Demonstrator, In the Pink, Designs by Cathryn.

I have prepared a step-by-step project tutorial for this project that includes cutting and scoring diagrams. The .pdf is ready to download and print for your personal use. If you would like to see more of these project recipes in the future please let me know. Click on the button below to get the project directions.

Today was a true Monday and I had terrible technical difficulties before going live for today’s Livestream. Fortunately, my fix for everything technical – restart all devices – worked and I was able to go on and demonstrate how to make the Easter Bunny Pocket Treat Holders.

Product List
Easter Bunny Photopolymer Stamp Set (English)
Tuxedo Black Memento Ink Pad
Fresh Freesia 8 1/2" X 11" Cardstock
Dandy Designs 12" X 12" (30.5 X 30.5 Cm) Designer Series Paper
Highland Heather 1/2" (1.3 Cm) Grosgrain Ribbon
Fresh Freesia Stampin' Blends Combo Pack
Flirty Flamingo Stampin' Blends Combo Pack
Mango Melody Stampin' Blends Combo Pack
Layering Circles Dies
Paper Trimmer
Stampin' Cut & Emboss Machine
Stampin' Seal
Tear & Tape Adhesive
Stampin' Dimensionals

Make Three Quick & Easy Valentine’s Day Treat Holders

Valentine’s Day is just a few days away and I have three quick and easy Valentine’s Day treat holders to share with you.

I used the Peekaboo Treat Bags from Stampin’ Up! for the first Valentine’s Treat Holder. After adhering two strips of the Country Floral Designer Series Paper to the top and bottom of the bag, I added a sentiment tag. The tag is made with the Heart Punch Pack and then embellished with die-cuts from the Share a Milkshake dies.

The second quick and easy Valentine’s Treat Holder is this cute chocolate-topped ladybug. I used the Hello Ladybug Bundle from Stampin’ Up! as the base for a heart-shaped Dove chocolate.

The final quick and easy Valentine’s Treat Holder I’m sharing with you today is this wrapped Hershey’s Chocolate Nugget. It’s a 1″ x 8-1/2″ strip of Country Floral Designer Series Paper wrapped around the chocolate. I embellished it with a stitched circle die-cut topped with heart die-cuts.

Watch the video for step-by-step instructions for all three treat holders

Product List
Share A Milkshake Bundle (English)
Hello Ladybug Bundle (English)
Tuxedo Black Memento Ink Pad
Sweet Sorbet Classic Stampin' Pad
Heart Punch Pack
Stitched Shapes Dies
Peekaboo Treat Bags
Country Floral Lane 12" X 12" (30.5 X 30.5 Cm) Designer Series Paper
Basic White 8 1/2" X 11" Cardstock
Sweet Sorbet 8 1/2" X 11" Cardstock
Polished Pink 8 1/2" X 11" Cardstock
Balmy Blue 8-1/2" X 11" Cardstock
Basic Black 8-1/2" X 11" Cardstock
Multipurpose Liquid Glue
Mini Stampin' Dimensionals
Mini Glue Dots

Make a Dollar Tree Valentine Apothecary Jar

Today’s project is a fun, Valentine Apothecary Jar that I made using supplies from Dollar Tree. I purchased these small, plastic mason jars at my local Dollar Tree. I have also seen plastic apothecary jars in the Dollar Spot at Target which would be perfect for this project.

Make these easy jars for table favors, home decor, and coworker gifts. Use different colors for the embellishments and they would be beautiful for a wedding shower. I plan on using them as decoration on my treat table at my Galentine’s Card Party. If you’re local to the Kansas City area we would love to have you join us. See the party details by clicking on this link: https://bit.ly/3wW7om5

Product List
Heart Punch Pack
Share A Milkshake Bundle (English)
Country Bouquet Photopolymer Stamp Set (English)
Real Red Classic Stampin' Pad
Polished Pink Classic Stampin' Pad
Stamping Sponges
Balmy Blue 8-1/2" X 11" Cardstock
Real Red 8-1/2" X 11" Cardstock
Polished Pink 8 1/2" X 11" Cardstock
Basic White 8 1/2" X 11" Cardstock
Baker's Twine Essentials Pack
Heat Tool (Us And Canada)
Mini Stampin' Cut & Emboss Machine
Multipurpose Liquid Glue
Mini Stampin' Dimensionals

Make a Valentine’s Treat Box

We’re already in the middle of January so it’s not too soon to start making Valentine projects. The sweet Valentine’s Treat Box project I’m sharing today is a quick and easy craft to put together.

The Valentine’s Treat Box is 2-3/4″ wide, 1-1/4″ deep, and 2-1/4″ tall. I was able to fit four Ghirardelli chocolates in the box. That’s a perfect sweet treat for Valentine’s! There are many occasions to gift this Valentine’s Treat Box. I think it would make a lovely teacher gift, coworker gift, book club treat, or table favor at your Galentine’s party!

I couldn’t decide if the Valentine’s Treat Box needed a handle or not so I made one of each. Which one do you prefer?

The Valentine’s Treat Box started with a box I made using Kraft Paper. I then chose the Country Floral Lane Designer Series Paper from Stampin’ Up to wrap around the box. Finally, I used the Country Bouquet Bundle to embellish the front of the box.

Here is another project I made using the bundle. You can view it HERE.

Cutting & Scoring Diagram

Score a 5-3/4″ x 5-1/4″ piece of Kraft cardstock at 5-3/4″ x 5-1/4″ at 2-1/4″ and 3-1/2″ on the 5-3/4″ side. Score at 1-1/4″ and 4″ on the 5-1/4″ side.

Product List

Framed & Festive 3-D Christmas Tree Treat Box

We’re on the countdown to Christmas this week but it’s not too late to make something special for your friends and family. Today’s project is this 3-D Christmas Tree treat box.

The tree-shaped treat box can be embellished with whatever you have in your stash. It’s also great to use up your scraps of Christmas-patterned paper. For my treat holder, I used the Painted Christmas Designer Series Paper and kept the sentiment simple with a stamped Noel from the Framed & Festive stamp set on a die-cut circle. I’m usually a more-is-more kind of girl but sometimes simple is better.

To create the “frame” for the Christmas tree start with a 3″ x 10-1/4″ piece of cardstock. Score at 1″, 3-1/4″, and 6-3/4″ on the 10-1/4″ side. Score it at 3/8″ x 3/8″ on both edges of the 3″ side. Fold and burnish all score lines then trip per photo.

Watch the replay of my Make-it-Monday Live Stream for step-by-step directions to make the Framed & Festive 3-D Christmas Tree treat holder.

Product List
Framed & Festive Cling Stamp Set (English)
Christmas Banners Bundle (English)
Real Red Classic Stampin' Pad
Evening Evergreen Classic Stampin' Pad
Painted Christmas 12" X 12" (30.5 X 30.5 Cm) Designer Series Paper
Garden Green 8-1/2" X 11" Cardstock
Real Red 8-1/2" X 11" Cardstock
Basic White 12 X12 (30.5 X 30.5 Cm) Cardstock
Layering Circles Dies
Real Red & Garden Green 3/8" (1 Cm) Ribbon Combo Pack
Red Rhinestone Basic Jewels
Simply Scored
Mini Stampin' Cut & Emboss Machine
Multipurpose Liquid Glue
Stampin' Dimensionals

12 Weeks of Christmas Framed & Festive Scrapbook Page

Twelve Weeks of Christmas Week #11

It’s week eleven of my new Twelve Weeks of Christmas series! Each week throughout the season I will be posting a new project with full-color instructions for you to download and print for your paper crafting library!

Today’s project is this Framed & Festive Scrapbook Page:

Click on the button below to view the full-color, step-by-step instructions. Feel free to download and print for your personal use.

Product List
Framed & Festive Cling Stamp Set (English)
Stylish Shapes Dies
Layering Circles Dies
Real Red Classic Stampin' Pad
Basic White 12 X12 (30.5 X 30.5 Cm) Cardstock
Real Red 8-1/2" X 11" Cardstock
Sweetest Christmas 12" X 12" (30.5 X 30.5 Cm) Designer Series Paper
Garden Green 8-1/2" X 11" Cardstock

Make a Cottage Wreaths Fun-Fold Card

Today’s Make-it-Monday project is this fun-fold Christmas card. I used the Cottage Wreaths Bundle along with the Painted Christmas Designer Series Paper from Stampin’ Up! to create it. The card unfolds with three panels. I added a pocket to one of the panels to tuck a gift card into.

This is such a versatile card that can be used for multiple occasions. I think a tag or small photo would be a cute idea to slip into the pocket of the card. It would also make a sweet mini scrapbook to gift to someone.

Cutting/Scoring Guide

  • Card Base = 5-1/2″ x 4-1/4″ piece of Real Red cardstock
  • Layer One = 4″ x 5″ piece of Garden Green cardstock
  • Layer Two = 3-3/4″ x 4-3/4″ piece of Painted Christmas Designer Series Paper
  • Triple Panel = 4″ x 10″ scored at 3-3/8″ and 6-3/4″ on the 10″ side
  • Panel One = 3-1/8″ x 3-3/4″ Painted Christmas Designer Series Paper
  • Panel Two Pocket = 3-1/8″ x 2-1/4″ Painted Christmas Designer Series Paper
  • Panel Three = 3-3/4″ x 3″ Basic White cardstock
  • Wreath = 3″ x 3″ Basic White cardstock
  • Holly Berries & Leaves = scrap Basic White cardstock
Product List

12 Weeks of Christmas Sweet Gingerbread Treat Pocket

Twelve Weeks of Christmas Week #10

It’s week ten of my new Twelve Weeks of Christmas series! Each week throughout the season I will be posting a new project with full-color instructions for you to download and print for your paper crafting library! And, new this year, I’ll be including a video tutorial to go along with every Twelve Weeks project!

Today’s project is this Sweet Gingerbread Treat Pocket:

Click on the button below to view the full-color, step-by-step instructions. Feel free to download and print for your personal use.

Video Tutorial

Product List

12 Weeks of Christmas Framed & Festive Gift Card Holder

Twelve Weeks of Christmas Week #9

It’s week nine of my new Twelve Weeks of Christmas series! Each week throughout the season I will be posting a new project with full-color instructions for you to download and print for your paper crafting library! And, new this year, I’ll be including a video tutorial to go along with every Twelve Weeks project!

Today’s project is this Gift Card Holder:

Click on the button below to view the full-color, step-by-step instructions. Feel free to download and print for your personal use.

Video Tutorial

Product List