Cards

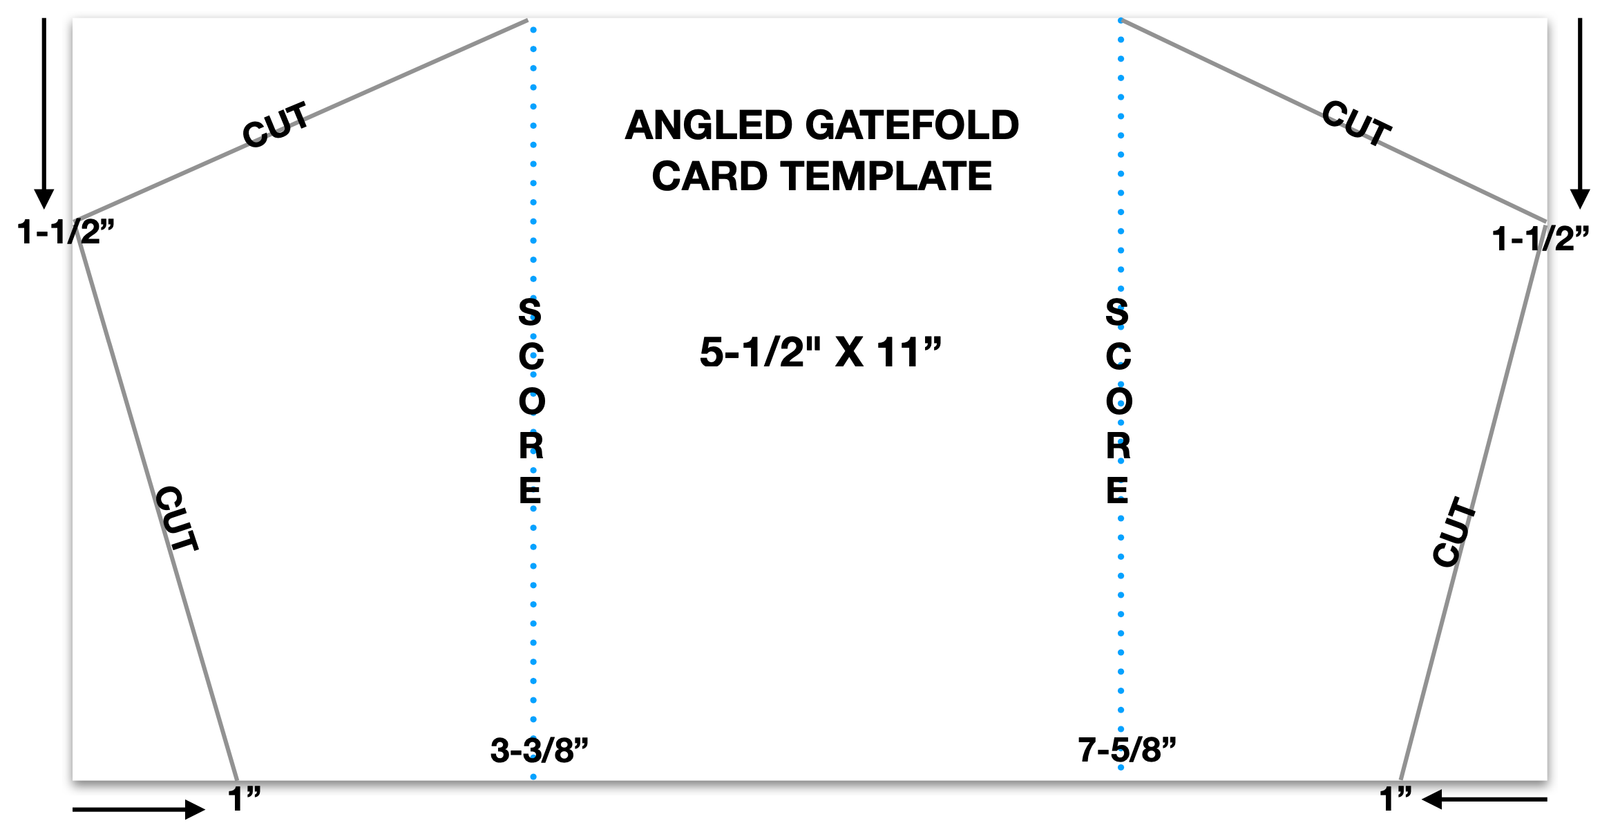
How to Make a Fun Fold Window All-Occasion Card


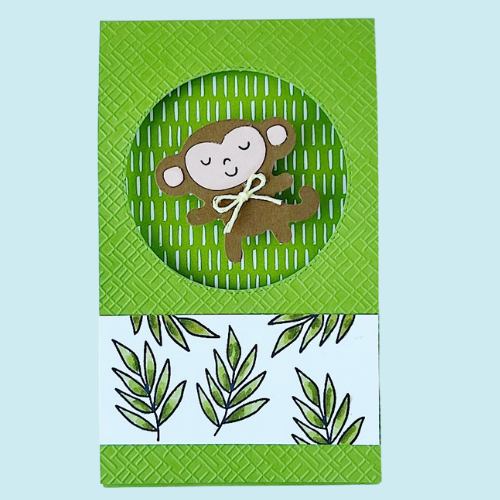
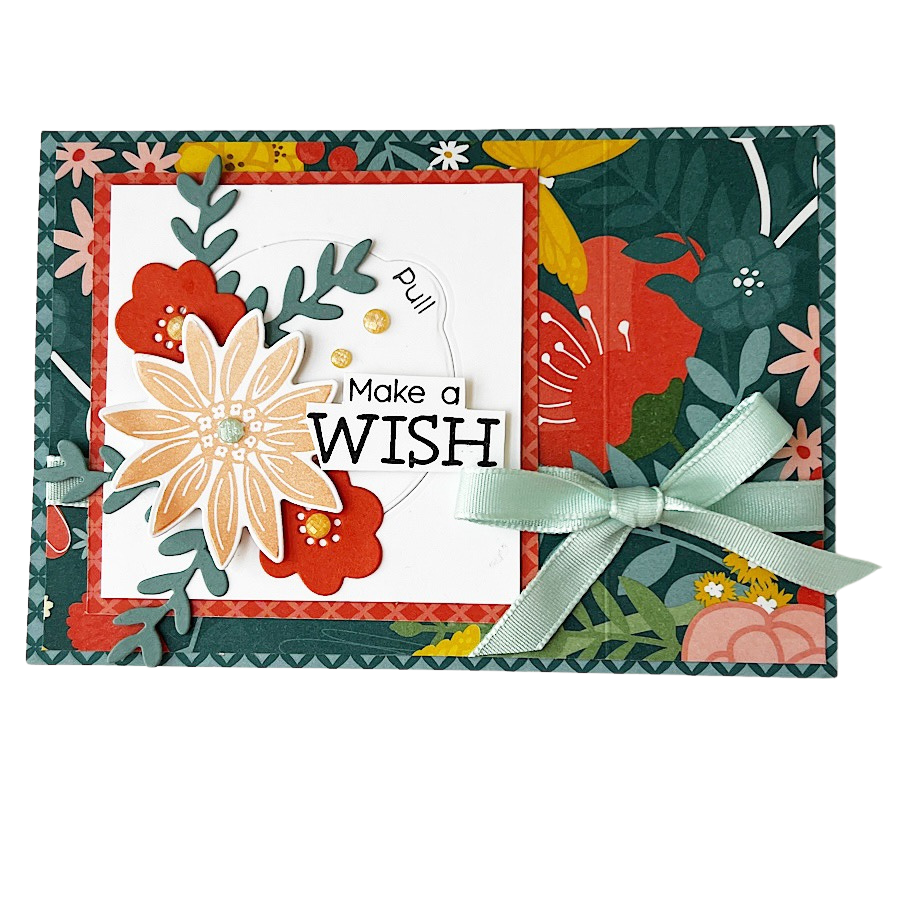
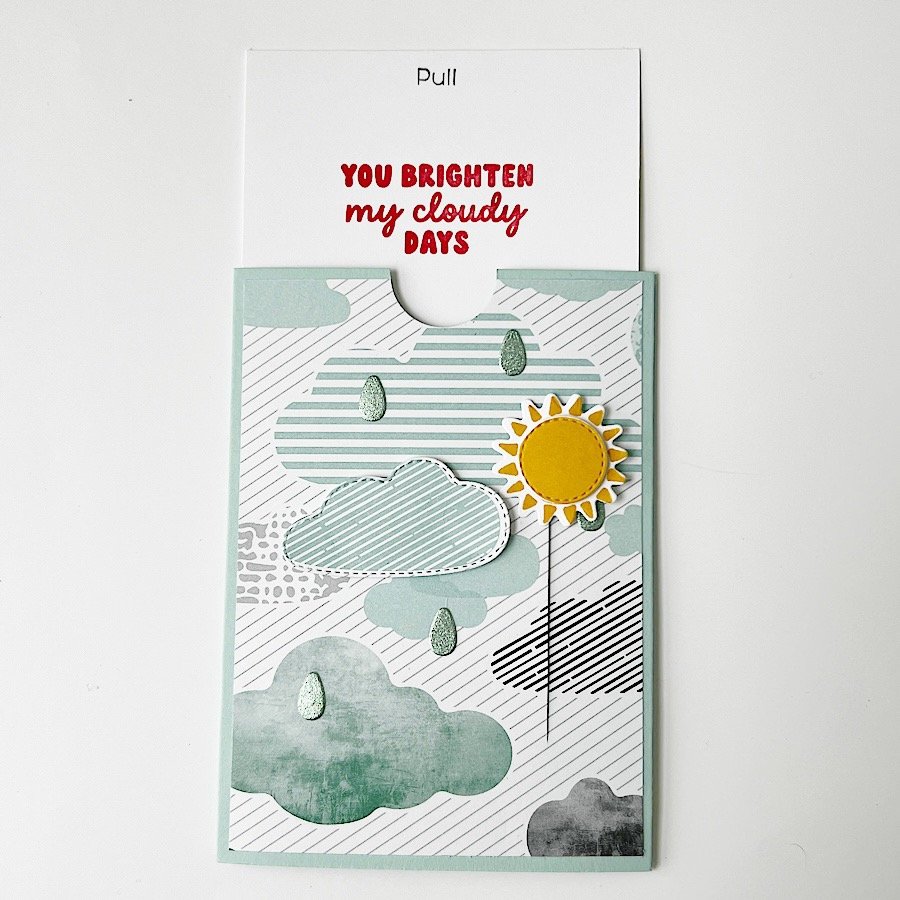
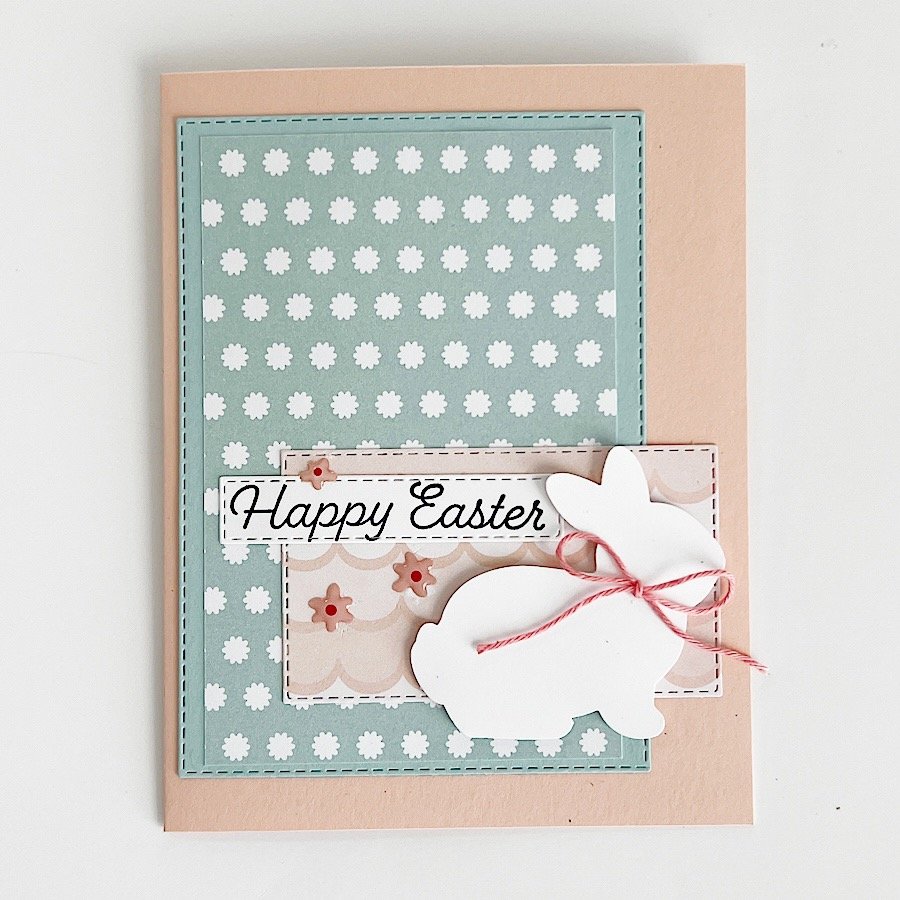
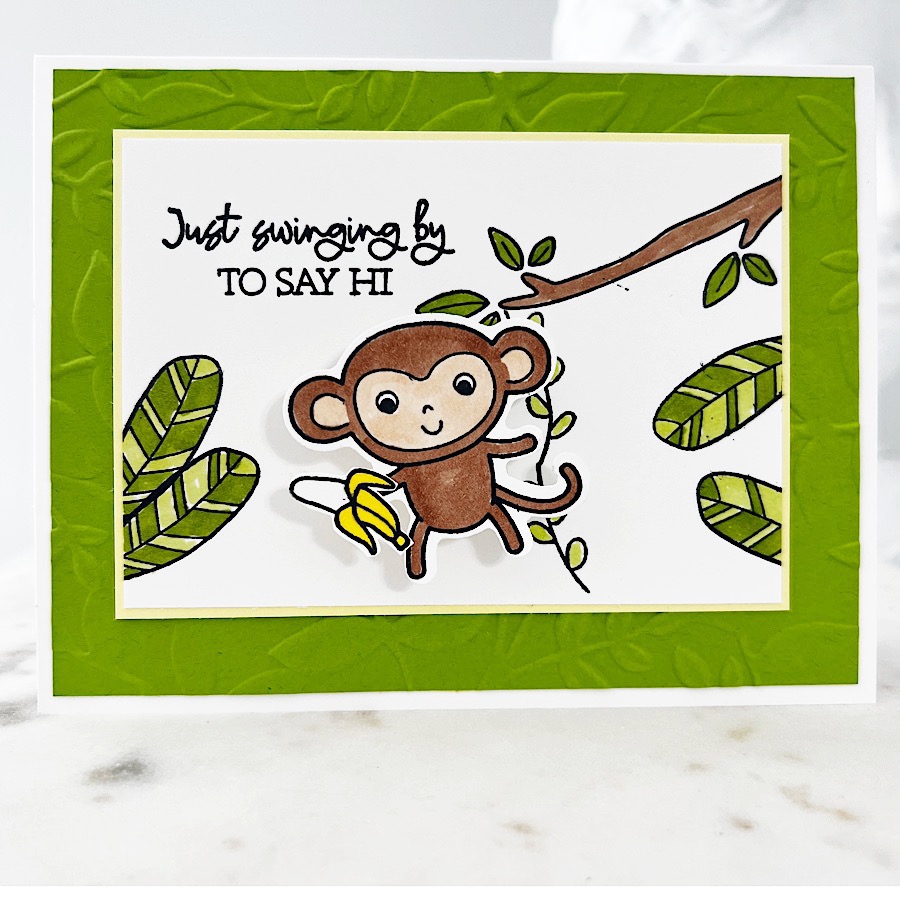
Today’s project recipe is a fun-fold window card. I used the Little Monkey Bundle to create my take on this fun-fold.

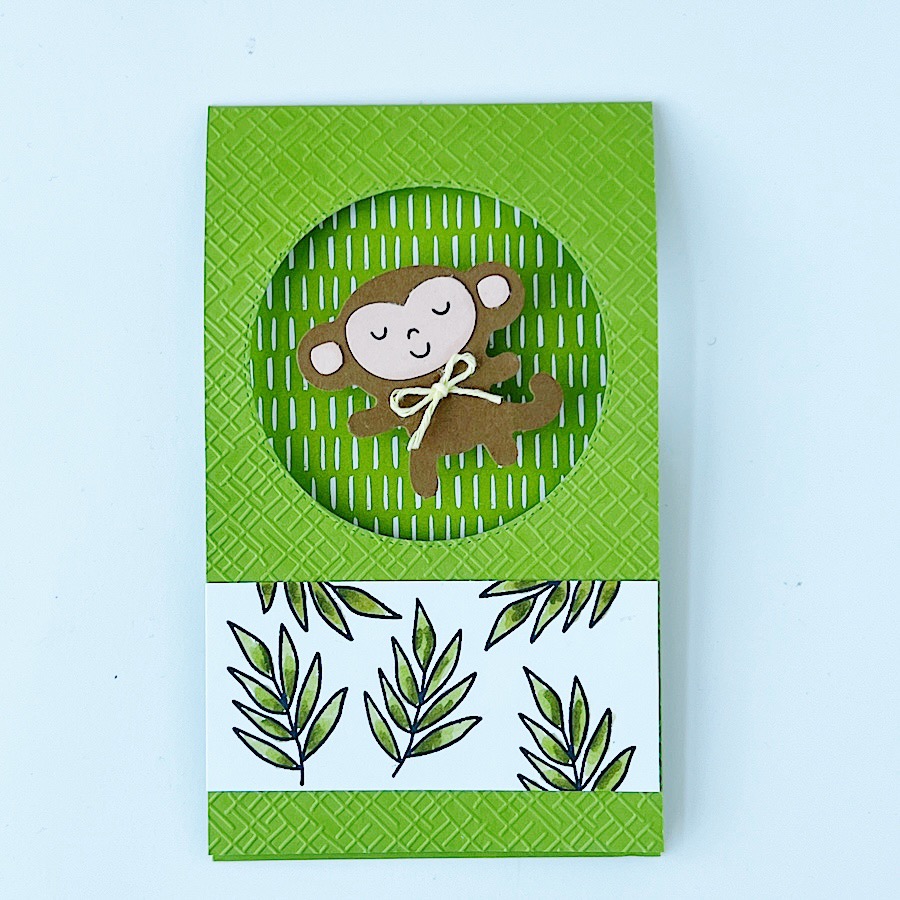
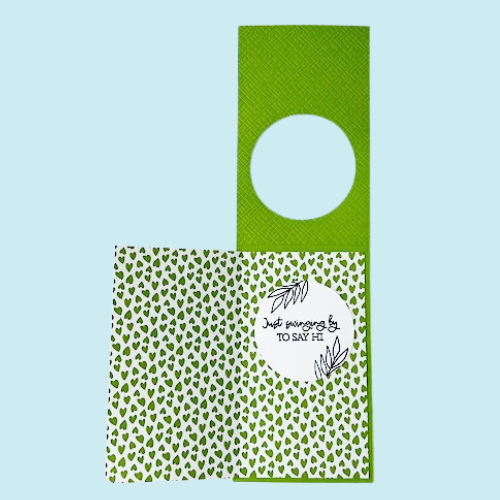
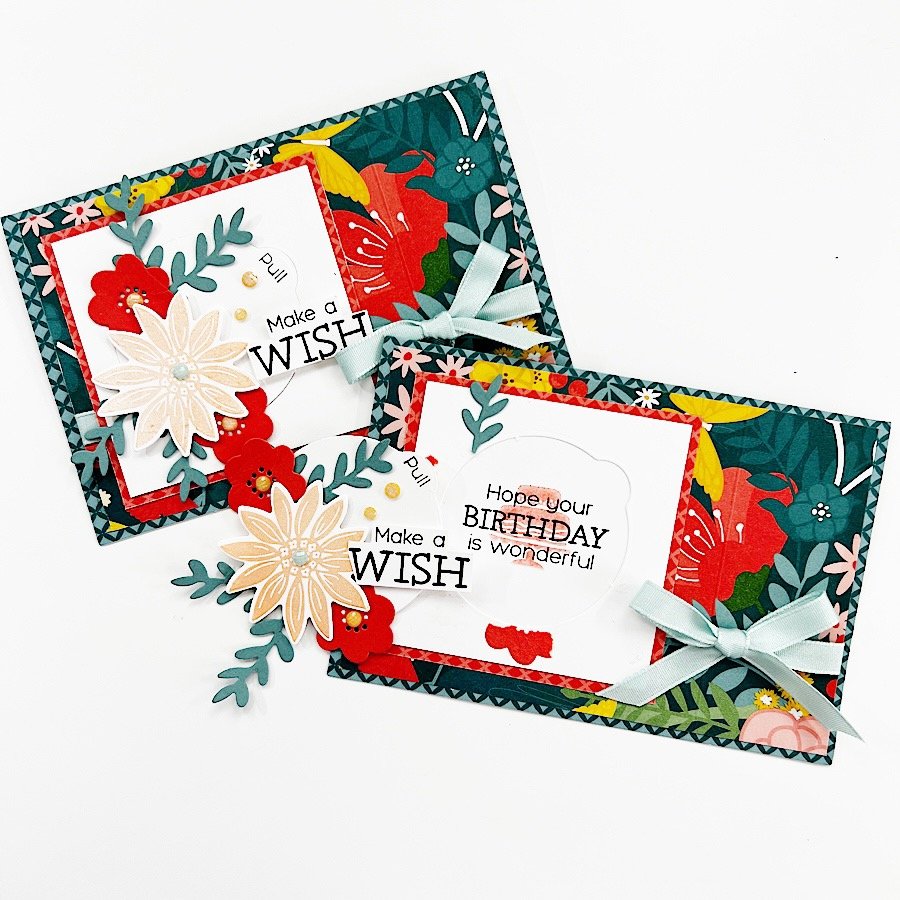
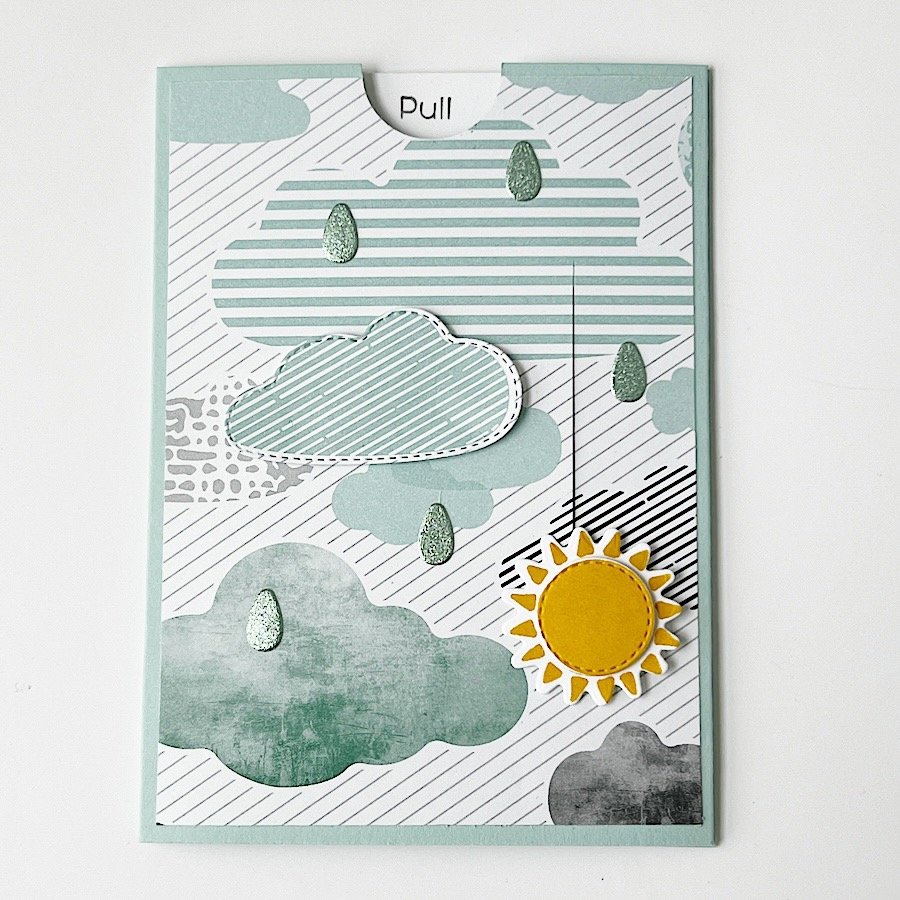
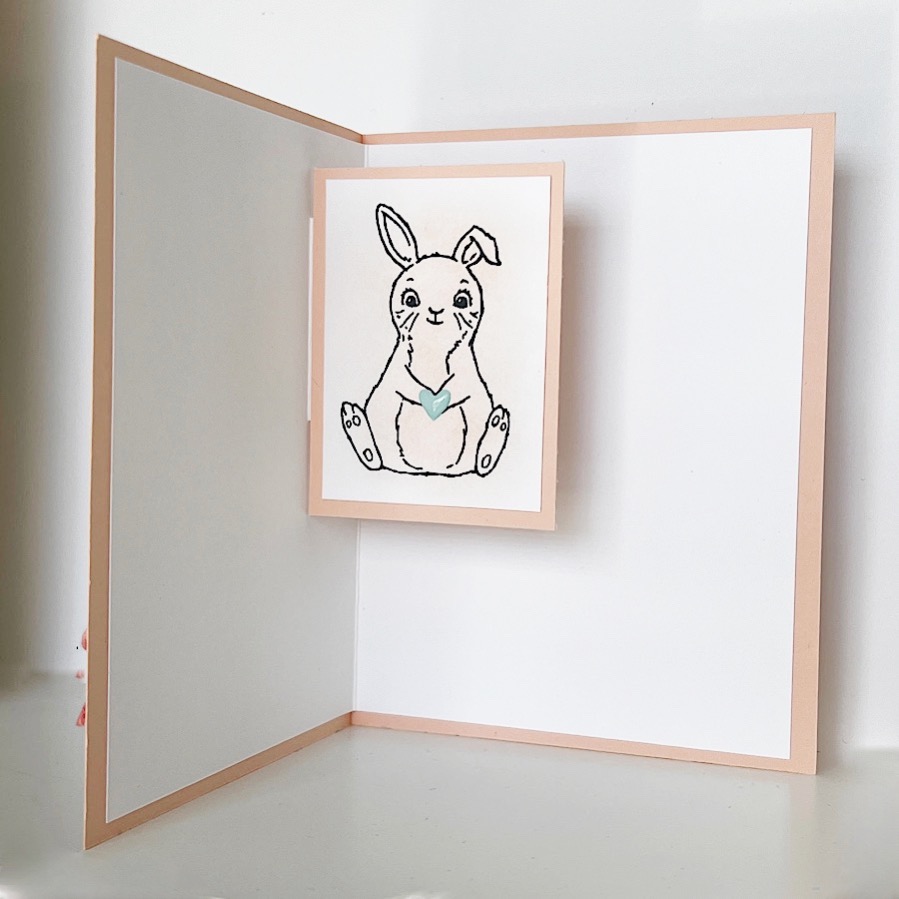
The monkey die-cut on the card has a slight wiggle because I used a Mini Action Wobble to adhere it, adding a playful touch. (You can find a link to the Mini Action Wobbles HERE.) But the real fun for this window card begins when you open it up!

The Little Monkey stamp set and coordinating punch have made their way onto the Retiring Products List. Get ready for the Retiring Products Sale starting tomorrow, April 9, 2024. As we bid farewell to both the Annual Catalog and the Jan-April Mini catalog, prepare for substantial discounts with savings of up to 60% off on overstocked products!

CLICK HERE FOR THE ANNUAL CATALOG RETIRING LIST

CLICK HERE FOR THE JAN-APR MINI CATALOG RETIRING LIST

Product List

Make an Angled Gatefold Card

During April, I’ll be demonstrating how to create various fun-fold cards in my Monday Mini Livestream classes. This week, we crafted an angled gatefold card using soon-to-be released products in tandem with the retiring Charming Sentiments stamp set.

When you slip off the belly band and open the card, it reveals this delightful design.

Although I faced a few challenges during the livestream while making precise cuts on the card base, overcoming that hurdle makes crafting this card a breeze. To aid you in the process, I’ve prepared these templates.

Card Base Template (not to scale)

Designer Series Layers (note to scale)

Product List

Make a Hooray for Surprises Interactive Card

Throughout February, I’ve been hosting virtual Monday Mini Card Classes, where I share fun and interactive cards. Catch up on the replays of this interactive card series by visiting: https://www.youtube.com/@ThePlaidPoodle/playlists

This week I demonstrated a card using the Hooray for Surprises Bundle from Stampin’ Up! The dies from the Hooray for Surprises Bundle create perforated edges with a tab. Simply pull the tab to reveal the message inside.

Product List

Interested in receiving a free project sheet of today’s card? Sign up for my Tuesday Tutorials! It’s free and easy to do, just hit up this link.

Don’t miss a Monday Mini Papercrafting Class episode – subscribe to my page or channel. Grab your coffee and hang out with me live next Monday! ☕️🎉

Facebook here: https://www.facebook.com/theplaidpoodle 

YouTube here: https://www.youtube.com/theplaidpoodle 

Make a Bright Skies Interactive Slider Card

If you’ve been following me for a bit you may know that I’ve been sharing various techniques for crafting interactive cards.

In today’s livestream, I showcased a slider card using the Bright Skies Bundle from Stampin’ Up! However, feel free to replicate this card using this easy technique with any crafting products you may already have.

When you pull the slider insert, the sun on the card front rises and the sentiment magically appears!

The slider card is easy to create using a paper trimmer – no special dies needed. For a step-by-step demonstration, feel free to watch the replay of today’s mini card-making class below to see how I make this fun card!

Product List
Bright Skies Bundle (English)
Hooray For Surprises Photopolymer Stamp Set (English)
Crushed Curry Classic Stampin' Pad
Poppy Parade Classic Stampin' Pad
Basic Gray Classic Stampin' Pad
Sunny Days 12" X 12" (30.5 X 30.5 Cm) Designer Series Paper
Pool Party 8-1/2" X 11" Cardstock
Basic White 8 1/2" X 11" Cardstock
Paper Trimmer
Bone Folder
Take Your Pick
Stampin' Pierce Mat
Silicone Craft Sheet
Stampin' Cut & Emboss Machine
Tear & Tape Adhesive
Stampin' Dimensionals
Multipurpose Liquid Glue

Interested in receiving a free project sheet of today’s card? Sign up for my Tuesday Tutorials! It’s free and easy to do, just hit up this link.

Don’t miss a Monday Mini Papercrafting Class episode – subscribe to my page or channel. Grab your coffee and hang out with me live next Monday! ☕️🎉

Facebook here: https://www.facebook.com/theplaidpoodle 

YouTube here: https://www.youtube.com/theplaidpoodle 

Make an Interactive Easter Card

Welcome to the first Monday of February, marking the beginning of a new theme for my Monday Mini Card-Making Livestreams! Throughout this month, I’ll be demonstrating various techniques for crafting interactive cards.

In today’s livestream, I showcased an Easter card featuring the adorable Easter Bunny stamp set and Bunny Punch from Stampin’ Up! However, feel free to replicate this card using the showcased technique with any crafting products you may already have.

When you open the card, this sweet ink-blended bunny magically pops up, adding an extra touch of charm and creativity to the card.

The pop-up insert is easy to create using a paper trimmer or scissors. For a step-by-step demonstration, feel free to watch the replay of today’s mini card-making class below to see how I make this charming Easter card come to life!

Product List

Interested in receiving a free project sheet of today’s card? Sign up for my Tuesday Tutorials! It’s free and easy to do, just hit up this link.

Don’t miss a Monday Mini Papercrafting Class episode – subscribe to my page or channel. Grab your coffee and hang out with me live next Monday! ☕️🎉

Facebook here: https://www.facebook.com/theplaidpoodle 

YouTube here: https://www.youtube.com/theplaidpoodle 

Make a Thank-You Card using Ink-Blending with Embossing Folders

Today marks the conclusion of my series on ink-blending techniques! Throughout my free Monday Mini Papercrafting Classes, I’ve shared various methods involving ink-blending. We started the series with an emboss/resist technique, followed by a masking technique, and last week, I shared how to ink-blend with stencils.

Today I shared how to ink-blend with embossing folders. Here is the card I made using the technique.

You may watch the replay of today’s mini card-making class here:

Product List
Darling Details Bundle
Perennial Postage Cling Stamp Set (English)
Countryside Blossoms Embossing Folder
Night Of Navy Classic Stampin' Pad
Granny Apple Green Stampin' Pad
Bubble Bath Classic Stampin' Pad
Boho Blue 8 1/2" X 11" Cardstock
Basic White 8 1/2" X 11" Cardstock
Blending Brushes
Small Blending Brushes
Stampin' Cut & Emboss Machine
Stampin' Seal
Multipurpose Liquid Glue
Stampin' Dimensionals

Interested in receiving a free project sheet of today’s card? Sign up for my Tuesday Tutorials! It’s free and easy to do, just hit up this link.

Don’t miss a Monday Mini Papercrafting Class episode – subscribe to my page or channel. Grab your coffee and hang out with me live next Monday! ☕️🎉

Facebook here: https://www.facebook.com/theplaidpoodle 

YouTube here: https://www.youtube.com/theplaidpoodle 

Make a Friendship Card using Ink-Blending & Stencils

I’m thrilled to share one of my all-time favorite ink-blending techniques with you! Today, during my free Monday Mini Papercrafting Class I demonstrated how to use ink-blending with stencils. Here is the card we made during class using the technique.

I even included some ink-blending on the inside of the card. It’s just a simple touch that adds a lot of interest.

You can watch the Mini Card-Making Class replay here:

Product List

Interested in receiving a free project sheet of today’s card? Sign up for my Tuesday Tutorials! It’s free and easy to do, just hit up this link.

Don’t miss a Monday Mini Papercrafting Class episode – subscribe to my page or channel. Grab your coffee and hang out with me live next Monday! ☕️🎉

Facebook here: https://www.facebook.com/theplaidpoodle 

YouTube here: https://www.youtube.com/theplaidpoodle 

How to Use Masks for Flawless Ink-Blending

I’m thrilled to share one of my all-time favorite ink-blending techniques with you! Today, during my free Monday Mini Papercrafting Class I demonstrated how to use ink-blending with masks. It’s a simple card design and perfect for beginning card makers! Here is the card we made during class using the technique.

You may watch the replay of today’s class here:

Product List

Interested in receiving a free project sheet of today’s card? Sign up for my Tuesday Tutorials! It’s free and easy to do, just hit up this link.

Don’t miss a Monday Mini Papercrafting Class episode – subscribe to my page or channel. Grab your coffee and hang out with me live next Monday! ☕️🎉

Facebook here: https://www.facebook.com/theplaidpoodle 

YouTube here: https://www.youtube.com/theplaidpoodle 

Monday Mini Papercrafting Classes are Here!

I’m excited to start something special, and I’d love for you to join me! I’ll be live on Facebook and YouTube every Monday morning at 10 am CT. Today was the premiere episode of Monday Mini Papercrafting Class. These free weekly sessions will highlight various card-making and papercrafting techniques.

This January, I’m particularly thrilled to share one of my all-time favorite techniques! Get ready for a range of tips and tricks that you can easily apply using the supplies you already have. Today’s class looks at ink-blending with the emboss/resist technique. Here is the card I made during class using that technique.

You can watch the replay of today’s class here:

Product List

Make sure to subscribe to my page or channel so you don’t miss an episode. Grab your cup of coffee, and me live next Monday.

Facebook here: https://www.facebook.com/theplaidpoodle 

YouTube here: https://www.youtube.com/theplaidpoodle 

Also, if you’re local to Kansas City today is the last day to register for my Welcome 2024 In-Person Card Parties. Click here for more details and to complete your registration.

Make a Circle Shaped Christmas Card with Forever Forest

Making a custom circle-shaped Christmas card is an excellent way to show your loved ones how much you care this holiday season! This card I’m sharing with you is a bit more formal, but you can always customize it by choosing products that reflect your own personality. The secret to a fantastic Christmas card is to make it your own. Have a blast with it, use your imagination, and your friends and family will be amazed with your unique circle-shaped Christmas cards!

Watch this video for the step-by-step instructions to create your own circle-shaped Christmas card!

Product List

Make a Bag of Bones Fun-Fold Halloween Card

Hey there, fellow cardmakers! We’re always on the hunt for cool new folds to jazz up our creations. Today, I’m super stoked to share this super easy-to-make card with you! You can totally customize the fold to match any occasion you’ve got coming up.

I used products from Stampin’ Up! Them Bones Suite for my card and oh boy, it turned out spooktacular! Check out this step-by-step video tutorial on how to create your own creepy-cool card

Cutting & Scoring Guide

Card Base = 5-1/2″ x 4-1/4″ piece of Thick Basic White Cardstock

Small Card Base = 5-1/4″ x 4-1/4″ scored at 2″ on the 5-1/4″ side.

Them Bones Designer Series Paper: 4 x 5-1/4″, 3″ x 4″, 1-3/4″ x 4″

Basic Black Cardstock = 3″ x 3″, scrap

Basic White Cardstock = two pieces 2-1/2″ x 2-1/2″ each.

———————— Supplies ———————— • Bag Of Bones Bundle (English) —— https://bit.ly/3PS6AZA • Tuxedo Black Memento Ink Pad —— https://bit.ly/33BmKPv • Them Bones 12" X 12" (30.5 X 30.5 Cm) Designer Series Paper —— https://bit.ly/3LkZCtn • Basic White 8 1/2" X 11" Thick Cardstock —— https://bit.ly/2LxIk0z • Basic Black 8-1/2" X 11" Cardstock —— https://bit.ly/3iyayDn • Deckled Circles Dies —— https://bit.ly/3ZxqImY • Paper Trimmer —— https://bit.ly/2YyAEhY • Mini Stampin' Cut & Emboss Machine —— https://bit.ly/3hNoXfu • Bone Folder —— https://bit.ly/3bfwe4p • Take Your Pick —— https://bit.ly/3pTTOK9 • Stampin' Seal —— https://bit.ly/39XGVrX • Multipurpose Liquid Glue —— https://bit.ly/33UUbfM

Step-by-Step Guide: How to Make a Fun-Fold Halloween Card

It’s September and that means it’s time to start your fall holiday crafting! Halloween will be here before we know it so I’m busy getting started on those projects. I made this fun-fold Halloween Card today during my Make-it-Monday Livestream.

I used traditional Halloween colors and the Them Bones Designer Series Paper for the card base and all the layers. I used dies from the Tricks & Treats Dies to make the cute candy corn die-cuts for the front flap of the card.

I think my favorite thing about this fun-fold Halloween card is the buffalo check ribbon embellishment. I colored the Very Vanilla squares in the ribbon with a Pumpkin Pie Stampin’ Blend. The sentiment tag with ribbon tie fills out the front flap of the card and adds some texture.

Cutting & Scoring Guide

  • Card Base = 6-1/2″ x 5-1/2″ piece of Basic Black Cardstock scored at 4-1/4″ on the 6-1/2″ side
  • Pumpkin Pie Cardstock = 5-1/4″ x 2″ and 2-3/4″ x 3-1/4″
  • Basic Black Cardstock = 3-1/2″ x 3-1/2″ scored at 1/2″ on one side
  • Basic White Cardstock = 4″ x 5-1/4″,
  • Scraps of Basic White, Pumpkin Pie, and Cajun Craze cardstock
Product List

Make an Easy Interactive Card

I’m not monkeying around with today’s card! I used a wobble spring to adhere the monkey to the card front creating a fun, interactive card. The wobble spring causes that cute monkey to bounce on the card.

The wobble springs are not expensive and are fun to use on all types of projects! I purchased my springs from Amazon.

Product List

Make a So Refreshing Double Z-Fold Card

So I did a thing. On Friday I was the guest crafter on Craft Roulette. The project we made was a Z-fold card. Here is the card I made during the show:

You may ask, “Why did you add the knitting sheep to your card?”. It doesn’t seem to make much sense, does it? Once you watch the episode you will understand. You can watch it by clicking on this link: https://www.youtube.com/live/n2l924Qdy08?feature=share

Making that z-fold card lit a fire under me to create a double z-fold card so that is what I did during today’s Make-it-Monday livestream. I used the So Refreshing Bundle from Stampin’ Up! to create the card.

Cutting & Scoring Guide

  • Card Base = 11″ x 4-1/4″ piece of cardstock scored at 2-3/4″ and 5-1/2″.
  • Double Z-Fold = 11″ x 1-1/2″ piece of cardstock scored at 2-3/4″ and 5-1/2″
  • Designer Series Paper = 4″ x 5-1/4″, two pieces 2-1/2″ x 4″ each, 1-1/4″ x 10-3/4″
  • Circle Die-Cut = 3-1/2″ x 3-1/2″
  • Sentiment Tag = 5/8″ x 2-1/2″
Product List